Showing posts with label baking. Show all posts

Sunday, January 28, 2018

Biscotti Da Te

For my last IRP project I wanted to make something a little easier and fun, so I decided to make
biscotti da te from The Il Fornaio Baking Book. “Biscotti da te -  literally, ‘tea cookies’ -  are buttery
confections that are  baked either plain or topped with a fruit jam.” (Galli 147). The cookies turned out
delicious and were greatly enjoyed.  
Adding egg
Creaming the butter and sugar 
The first step was to mix the butter and sugar. I added both ingredients  to my mixer then creamed
them together for about 5 minutes. Next I added one whole egg and continued  creaming the
ingredients together. Finally I added the last of the wet ingredients, an egg yolk, vanilla, and lemon
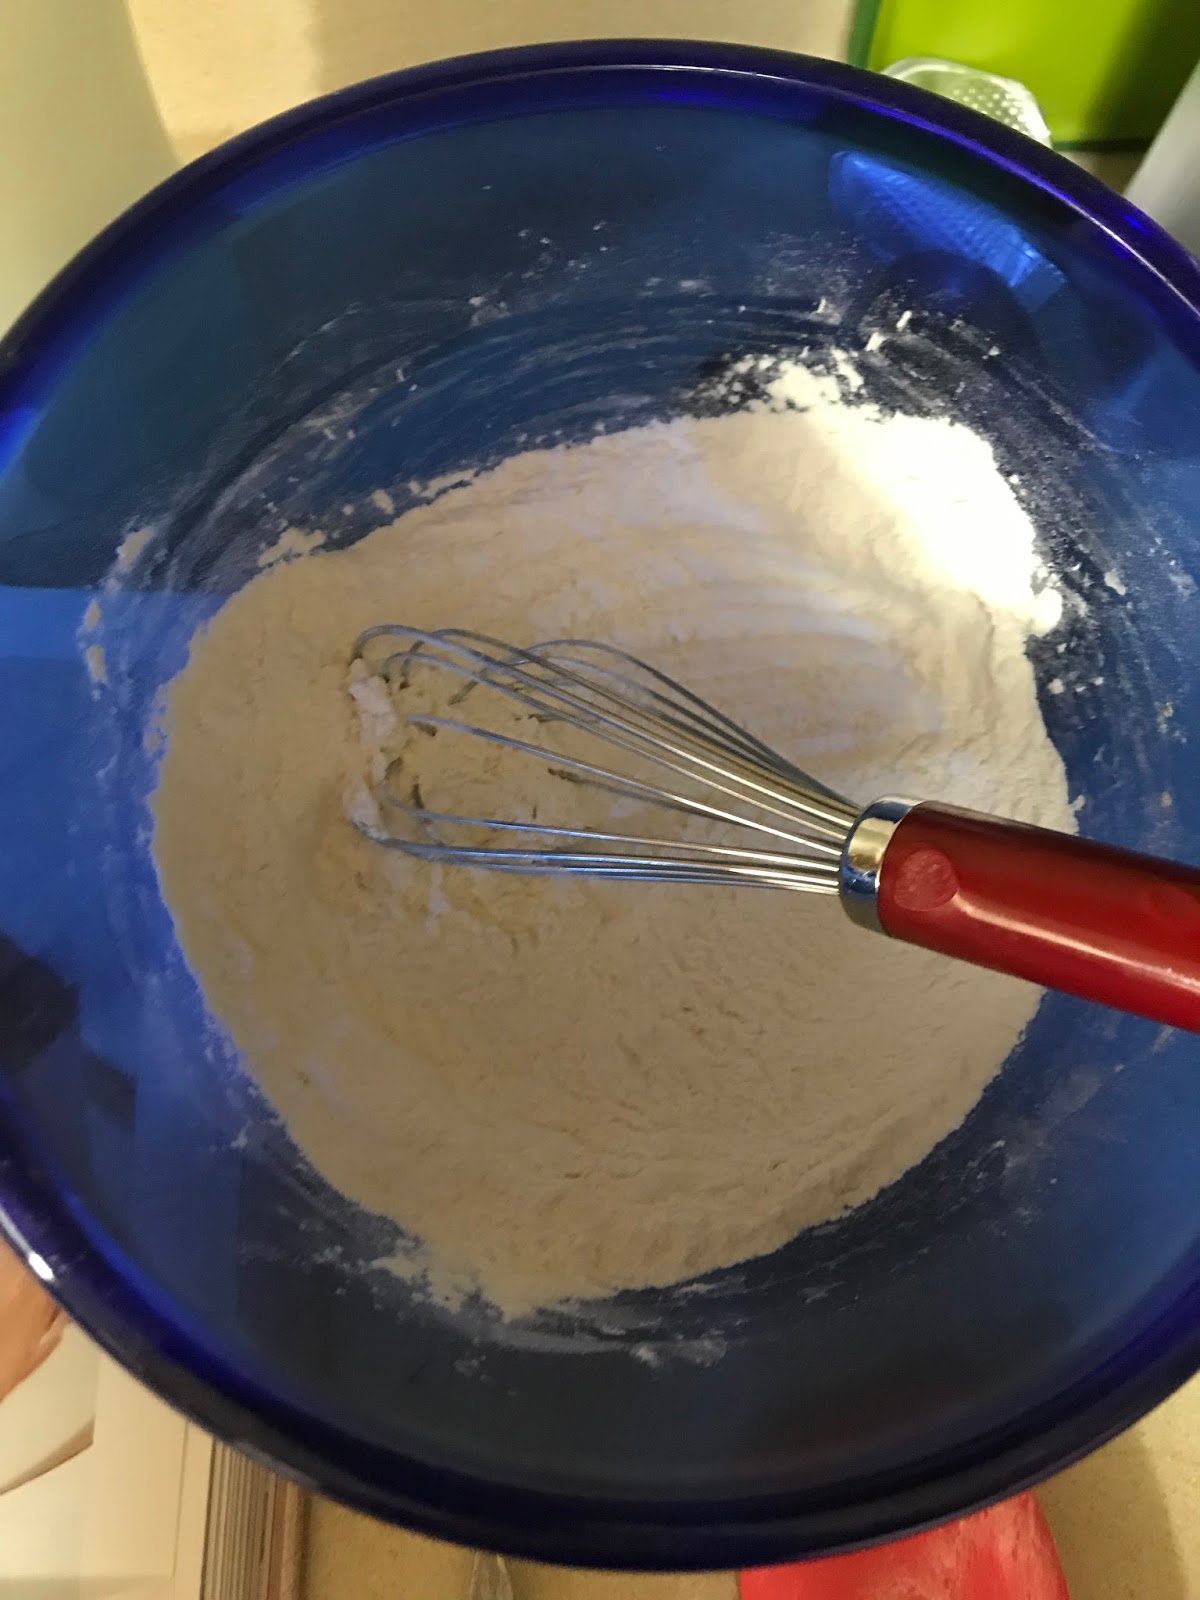
zest. Then slowly I mixed the flour into the wet ingredients,  as I added the flower the dough began to
come together and become easy to work with. I turned the dough out onto a counter top and kneaded
Scraps and cookies with jam before baking.
a few times before flattening it into a disk and letting it chill in the fridge for about an hour. Once the
dough had chilled, I rolled  the dough out then using a cookie  cutter  shaped as many cookies as
I could. I gathered the scraps and rolled the dough out one more time. I cut out more cookies but,
since Galli recommends not to roll out the dough again or risk your cookies developing a tough texture (Gali 147)
I decided to bake the leftover scraps.
I immediately baked about half of the cookies but decided to try jam on the other half.  Galli
explained how the jam is spread over the top of the cookie. “Make a shallow indentation in the center
of each cookie and spoon ½ teaspoon raspberry or apricot  jam into each hollow.” (Galli 147). I
carefully followed Galli’s instructions trying to avoid dripping the jam and mostly succeeding. I baked all
the cookies for about 15 minutes, until they were solid and dry.


Cookies after baking
The cookies got many rave reviews both the ones
with and without jam. I think that the jam ones were a bit better because the jam made them less dry and the lemon and raspberry flavors compliment each other.  Over the course of the last quarter I have learned a lot and I am a better baker now then I was when I started. I now know have a better understanding of Italian baking and all the work it requires.


Works Cited 
Galli, Franco. The Il Fornaio Baking Book: Sweet and Savory Recipes from the Italian Kitchen. Chronicle, 2003.

Saturday, January 27, 2018

Doughnuts - Baked Raised

For my last blog post, I decided to try to make another doughnut. This time, I chose to make a baked doughnut. The recipe described the baked doughnut as "soft and light" which immediately made me want to try it out.

First, I put an egg and sugar in a bowl of a stand mixer and I turned that on until everything was all mixed. Then, slowly I added in milk, yeast, salt, vanilla, and butter. Once all of those ingredients were dissolved and mixed together, I began to add flour half a cup at a time with the stand mixer on low. Then I kneaded the dough and put it in a bowl and let it sit for an hour. The hardest part for me was when the dough kept sticking to the hook in the stand mixer. As the mixer was on, the dough would stick and not mix so I'd have to go in with a spoon.

After an hour, I got the dough and rolled it out with a rolling pin so that it was 1/2 an inch thick. I cut the doughnut shape with the top of a cup because I didn't have a doughnut cutter but it still worked. Then I let the cut out doughnuts sit for 20 minutes to double in size and then I popped them in the oven for about 7-8 minutes. They came out golden brown.

The doughnuts with the maple glaze on top, 
Making this batch of doughnuts was much easier for me this time around and that might be because it's not my first time making them. I had the experience of making the doughnuts from last time which helped out. The doughnuts this time were smooth on top and the maple glaze stuck easily. I was pretty pleased with the results and they tasted really good! 

What do you guys think? Have you ever had something not go so well at first and when you tried it out again you improved?


Doughnuts - Maple Glaze

Maple glaze has always been another one of my favorites. So when I had found the recipe in my book, I had to try it. Just like the other glaze recipes, this one also had only 3 ingredients and was only 1 step. 

Ingredients
11/2 cups of confectioner's sugar (sifted)
2 tablespoons of maple syrup
2 tablespoons of milk or water (I used milk)

Steps
1. Place the sugar in a medium bowl and stir the maple syrup and milk to make a smooth pourable glaze. 


The confectioner's sugar and Maple Syrup


The recipe made it very clear on how to make the maple glaze. My first batch was perfect! Unlike the chocolate glaze, the maple glaze actually tasted the way it was supposed to. Sifting the confectioner's sugar also made it easier to mix all the components well together. However, I did have to add a bit more maple syrup to the glaze mix because at first the glaze tasted only like the confectioner's sugar. I added about a half a teaspoon. I loved how simple and easy it was to make this glaze, and it was delicious!


What do you guys think? Do you like maple glaze on doughnuts? Would you ever try making this?

Wednesday, January 24, 2018

Hello Cupcakes!! 

On my other blogs, I focused on the cupcakes and frosting designs. However, this time, I decided to make homemade vanilla buttercream frosting. Making frosting is much more simple than I thought it would be. Anyways, thanks to page 227 from the book Hello Cupcakes by Karen Tack and Alan Richardson I got a recipe for the frosting. 

The ingredients you'll need are ;
1 container (16 ounces) Marshmallow Fluff
3 sticks unsalted butter, softened and cut into 1-inch pieces
1 teaspoon vanilla extract 
1/2 cup confectioners sugar, plus addition if needed

I actually didn't have marshmallow fluff at home, so all I did was add an extra 2 cups of powdered sugar into the recipe, and I added a tablespoon of milk. The steps to making the frosting were pretty simple. Page 227 tells us "Spoon the Marshmallow Fluff into a large bowl. Beat with an electric mixer on low. Gradually add the butter pieces, beating well after each addition, until smooth. Add vanilla extract and the 1/2 cup confectioners sugar. Scrape the bowl well to incorporate. Add more confectioners sugar, if necessary, to adjust the texture." 

When I mixed the sugar and butter together, it was very clumpy and I thought I messed it up, so if that happens dont worry about it because once i added some milk, it turned out smooth and creamy. Just keep on mixing it until it's not clumpy. If your frosting is too thick, add some milk, but if it's too thin then add more powdered sugar. At the end I added a pinch of salt to cut out the sweetness. 

Here is the finished frosting, it was very smooth and it was 100% times better than store-bought frosting because it didn't have that cloying sweetness, and it just tasted better. If you ever make cupcakes and you have all of these ingredients at home, you should make frosting because it's much more delicious. 

Hopefully your frosting looked like this as your finished product. 


To go along with the frosting I decided to bake a cake, after it was done I spread the frosting on top and cut up some strawberries. It doesn't look as good as a cake from the store but it sure did taste better. 

Thank you for reading my blog posts, it was a fun ride, and it made me expand on my creativity. I hope you learned something from my posts. Thank you!


What's your favorite type of frosting? Do you think you'll make your own sometime? 

Richardson, Alan, and Karen Tack. Hello, Cupcake! Houghton Mifflin, 2009. 


Saturday, January 20, 2018

Challah

       This week I continued improving my bread baking skills by spending about five hours creating a delicious challah or egg bread. I used a recipe from The Il Fornaio Baking Book by Franco Galli. This dish was easier than I thought it would be with a very light and easily manipulated dough.  I had some problems with the presentation of the bread but the end product was delicious and rich.  
Kneading the dough 
Three strands ready to braid. 
The first step was to make a biga or starter, if you want more information on this piece, check out my first blog post. Once the biga spent 20 hours rising, I mixed flour, sugar, and salt in a bowl and created a well. Then I added eggs, oil, and biga to the well and began stirring with a spoon, working the dough until it was well mixed and sticky. At this point Galli recommends to, “ begin kneading the dough in the bowl (it will be quite sticky), keeping one hand clean in order to hold and turn the bowl and using the other hand to work the dough,” (Galli 77).  I quickly followed his instructions kneading the dough until it came together easily into a ball. Next, I let the dough rise for about one and a half  hours in a covered bowl. When I return the dough had about doubled in size. I carefully punch the air out with my fingertips before laying it out to rise for another hour.
Finished braid! 
Finally it was time to braid the dough. I divided the dough into three equal portions then following Galli’s advice, “Working with one portion at a time and using the palms of your hands, roll it into a “strand” about 12 inches long and 1 inch in diameter,” (Galli 77). I carefully rolled the three sections into strands then I began to weave  them together like one would  braid hair. The braid came together surprisingly easily and looked good once finished. I covered the braid and let it rise for another hour.
Unfortunately, in my rush I didn't think about covering the braids and once it has risen most the braid had stuck to the towel! The  braid design was completely ruined but I used an egg wash and baked it anyways. Although I didn't have the nice braided look, it tasted delicious.

Oops! The ruined braid. 
Next time I try this recipe I will be careful about covering the braid and perfecting my presentation. Have you ever baked a braided or woven bread before? Have you ever enjoyed one? Let me know in the comments below.
Final product. 

Wednesday, January 17, 2018

Hello Cupcakes!!

My previous blogs had everything you can imagine about doing cupcakes. I taught you guys how to frost, and how to properly fill the cupcake pan with batter in order to get the best cupcakes. However, this time, I wanted this blog to be more creative. 

Today, I am going to frost designs on my cupcakes to make them more appealing. I don't know about you, but when I'm at a party and I see cupcakes, I always choose the ones that are very creative because they look more appetizing.  

First off, I started by baking some fresh and delicious cupcakes. I made a regular vanilla recipe cupcake batter but I added two handfuls of sprinkles and they looked so pretty after they baked. 


Inspired by the book Hello Cupcakes by Karen Tack and Alan Richardson, I decided to create petal like designs from frosting on my cupcakes. Trying to recreate light pink flower petals, I put strawberry syrup in the frosting before adding it to a Ziploc bag. I had to cut out a specific shape in the corner of the bag in order to achieve a petal like design. As you can tell by the picture below, you have to cut the corner into a v-shape in order to achieve that design. 


On page 14 of Hello Cupcakes it said, "Starting off the perimeter of the cupcake, place the tip flat on the surface of the cupcakes. Squeeze the bag, pulling away from the center of the cupcake. Use small side-to-side pushes or wiggles to make the leaf or petal shape. Work toward the center in concentric circles, overlapping the patter slightly." Now, honestly, this took me a couple of tries because the pattern isn't that easy to achieve. What helped me was putting the bag with the frosting in the freezer for 30 minutes so that it's firm. Then I piped the frosting on carefully and patiently, it'll take precision. 


Here is my finished product. Light pink petals piped on the cupcake. It isn't that good but hey I'm not a professional, and I hope you guys are learning along with me. It was fun to make, but it also came with patience. 


What is the most creative design you've seen on a cupcake? 


Richardson, Alan, and Karen Tack. Hello, Cupcake! Houghton Mifflin, 2009.


Sunday, January 7, 2018

Hello Cupcakes! 

Today, I did an experiment to see if the tips in the book really make a difference. On page 9 of Hello Cupcakes by Karen Tack and Alan Richardson, they give us helpful steps to filling up the cupcake pans correctly with Ziploc bags saying, "Put the cut opening in the center of a cupcake liner, squeeze gently, and fill the cup two-thirds full. As the batter approaches that level, stop applying pressure and remove the tip from the cup." 

I thought, "how difficult could it be to just fill up the cupcake pans with a spoon, like I usually do?" So, in one of the pans I poured the batter with a spoon, in the other cupcake pan I used a Ziploc bag and followed the steps in order to fill the cupcake cups correctly. And here are the results. 

The plate at the top contains the cupcakes that were filled with the Ziploc (book method). 
The plate at the bottom contains the cupcakes that were filled with a spoon (my method). 

Book method: 
Using a Ziploc bag to fill in the cupcake pans with batter was much neater, and quicker, all you had to do was just squeeze the bag until the cup was filled. And as you can tell by the picture, the cupcakes turned out more similar in sizes, and were more consistent. 

My method: 
It was the easiest method for me before, all I had to do was scoop the batter with a spoon but it was messy and took a long time. 

Overall, the tips that the book gave me were very helpful and I'll continue using that method of filling cupcake cups because it took less time and it wasn't as messy as using a spoon, like I used to do previously. 


How have you filled cupcake pans before? Do you think you'll use this method now? 


Richardson, Alan, and Karen Tack. Hello, Cupcake! Houghton Mifflin, 2009.

Saturday, December 30, 2017

Instant Pot Cooking: Crème Brûlée

Now that it's coming to an end for 2017, I realized I have not made crème brûlée yet. Therefore I think it's time. Unfortunately I did not have a kitchen torch to create that crisp, brown, sugar top, but nonetheless, it was amazing! Last time I cooked something savory, pot roast, so this sweet dish is something different.

Crème brûlée is very easy to make. In the book, Instant Pot Obsession, by Janet A. Zimmerman, it provides us with a slightly different recipe than I'm familiar with. You need: egg yolks, vanilla extract, sugar (granulated and brown), heavy whipping cream, and water (Zimmerman). Baking it doesn't take too long compared to hours of chilling.

In the picture on the right are different size ramekins filled with a creamy mixture of yolk, cream, vanilla, and sugar. After I mixed all of these ingredients together, I stacked the ramekins in the Instant Pot. I then cooked them on high for 6 minutes and released the pressure for 10 minutes. An important part is the patience you have for them to cool. If you don't let them cool for the adequate amount of time, the top won't be stable enough to hold out the sugar for you to torch it. To avoid that, I chilled them over night just to be safe.

The tricky part about crème brûlée is the top. The cooling plays a part of it, laying a strong, even foundation for the sugar. For example, I got rid of the air bubbles by simply taking a napkin and tapping them. Once I placed a pile on sugar on each, I made sure that it was even throughout. If I had a kitchen torch, I would try and create a beautiful, brown top to break through to the creamy inside. "Watch them carefully, as they can go from browned to burned quickly" (Zimmerman 210). Burning the top takes away from the delicate tone of the dish.

Using the Instant Pot let me realize that there are so many ways to cook crème brûlée other than burning yourself with the hot water-bath fresh out of the oven. I'm excited to create more dishes using the Instant Pot!

Have you ever made or tried crème brûlée? If not, explain why and put it on your 2018 New Years Resolutions list!


Thursday, December 28, 2017

Hello cupcakes!

It is a couple days after Christmas, and no matter how much food I ate over the holidays, I am still always hungry for cupcakes. When my family got together on Christmas Eve, there were lots of sweets like cakes, and pastries, and candies, but I was still longing the taste of cupcakes because they are my favorite comfort dessert. To fulfill my craving for cupcakes I baked some delicious, chocolate ones.

In my last blog, I did a simple frosting coating on the cupcakes with a spatula. This time, I decided to actually pipe the frosting on. Now, here's a life hack; since we all have Ziploc bags at home instead of piping bags with frosting tips, we can use them to pipe the frosting on. Luckily, the book Hello Cupcake! by Karen Tack & Alan Richardson gave me tips for this life hack method. On page 13, they tell us how to properly fill a Ziploc bag in order to be able to frost cupcakes, "To fill the ziplock, hold the bottom of the bag inside out over your hand. Using a spatula, fill the area of the bag inside your hand. Lift the edges of the bag up and around the frosting, press out the excess air, and seal the bag. Grasp the bag by the zippered edge and squeeze the frosting down to one corner." I used these helpful hints and then I cut a hole in the corner with scissors to create a frosting tip.
And then, I used this Ziploc piping bag to pipe the frosting on my cupcakes. This life hack was so helpful because I don't have piping bags with different frosting tips, but I love baking cupcakes and I want to make them look good, so using a Ziploc bag instead is very useful. 
I did a basic design on my cupcakes, but we're just getting started! Just wait until my next blog post, I'll be using frosting to make decorations and designs on cupcakes, stay tuned! 

What was the most useful life hack you've used? And do you think you will try this one out? 


Richardson, Alan, and Karen Tack. Hello, Cupcake! Houghton Mifflin, 2009.


Torta Maddalena (Sponge Cake)


     While on winter break I wanted to continue to improve my baking skills, so last week I took a crack at Torta Maddalena also known as sponge cake. I found this recipe in The Il Fornaio Baking Book by Franco Galli. This classic recipe is used to construct the famous Italian Tiramisu, but before I try that trickier desert I wanted to practice the cake. Galli explains that he doesn’t know where the Italian name of this desert came from, “But Italians often name dishes after saints, so perhaps it honors Santa Maria Maddalena,” (Galli 159). No matter where the name came from the dish is a great classic that can be used in a multitude of sweet treats.
Mixing the egg mixture into a mousse. 
     For a perfectly formed sponge cake Galli recommends a springform pan which has sides that can be easily removed from the bottom. This pan allows for cakes with soft and fragile bottoms to be easily removed from the pan. They are commonly used to bake cheesecakes, quiche, and coffee cakes. I greased my pan and placed a sheet of parchment paper  on the bottom. The paper helps stop the cake from sticking to the base of the pan. I then preheated the oven to 350* F. Next, I sifted flour and baking powder together into a bowl before mixing the wet ingredients.
     To mix the wet ingredients I made a double boiler. I filled a pot filled with water and set a bowl on top of it.  As the water in the bottom pot reached a boil, the top bowl heated up warming the ingredients.  I added the honey, lemon zest, eggs, sugar and the egg yolks to the warmed ingredients in the top bowl.  To separate the yolks, I squeezed a plastic water bottle over the yolk so the yellow center of the egg was sucked into the bottle. It was tricky to get the yolk in to the bottle without it popping but eventually I got three yolks separated and added to the double boiler.
The cake baking. 
     Once the double boiler had heated the mixture to about 120* F. I poured the yellow liquid into a bowl and began to whisk it at high speeds. After about 10 minutes of whisking the mixture had formed a fluffy, creamy, and smooth mousse. Slowly I sifted the flour mixture into the wet mousse. Galli explains the best way to combine the wet and dry mixes, “Using a wire whisk combine the dry ingredients and the wet ingredients with a folding motion: gently move from top to bottom of the batter in a continuous action until no lumps remain” (Galli 159). Once I had carefully followed Galli’s instructions, I poured the batter into the cake pan and placed in the cake in the oven. I baked the cake for about 40 minutes before pulling it from the blistering oven. The cake had 5 minutes to cool before I carefully unclasped and lifted off the sides of the pan.  Then, 10 minutes later I lifted the base of the pan off the cake bottom and then pulled the paper from the bottom. Thanks to my prep, the cake easily came free of the pan with having to be cut. After freeing the cake from the pan, it was ready to enjoy.
Finished slice of sponge cake. 
The cake after it was cut. 
     For my first time baking a sponge cake and my first time using a double boiler the cake came out pretty good. Next time I try this recipe, I want to combine the wet ingredients in a bowl and then pour the mixture into the boiler so everything starts cooking at the same time. I would also whip up a creamy frosting to cover the cake and add more flavor. I learned a lot from this recipe and I’m excited to use my new skills on other recipes. Have you ever used a double boiler? Did it work for you or do you need to keep practicing? Let me know in the comments below.

Doughnuts - A Basic Raised Doughnut

In my cookbook, the first recipe on there was the basic raised doughnut. It's the type of doughnut that most people see at stores. Before this, I had never made doughnuts before. At first, just looking over the recipe I felt overwhelmed. I had never made doughnuts before and I saw long paragraphs on the recipe. I had to ask my mom for help on some things, but the doughnuts turned out well.

The recipe asked for 9 ingredients and said it would make about 8-14 doughnuts. It also said that it takes 20 minutes of active time, which probably is the time it takes for someone to be actively cooking. The recipe says that the doughnuts take 2 hours to be done.

While reading over the recipe and making the doughnuts, I really liked how detailed the recipe was. The paragraphs for the steps on how to make the doughnuts had enough details that explained everything well.


I enjoyed making the doughnuts. They came out better than I expected they would. A part I struggled with was making the actual dough. I also did find that the sugar glaze didn't really stick to the doughnut. The chocolate glaze stuck to the doughnut better. Still, they tasted pretty good.

Doughnuts with the glazes I made. 

Do you guys like doughnuts?

Doughnuts - A Chocolate Glaze

Along with my basic sugar glaze, I also decided to make a chocolate glaze. It is a very common glaze that is on many doughnuts. When I read the recipe, I noticed that it was very short and simple like the glaze recipe. It contained only 4 ingredients and it had 1 step like the basic glaze recipe.

Ingredients:
11/2 cups of confectioner's sugar
4 tablespoons of cocoa powder
2 tablespoons of milk or water (I used milk)
2 teaspoons of vanilla

I used this type of cocoa powder but it was very bitter.


Steps:
1. Stir together the sugar and cocoa powder in a medium bowl. Slowly stir in the milk and vanilla, a little at a time, to make a smooth, pourable glaze.


So at first, I saw the easy recipe and I thought it would be easy to make. The first batch of chocolate glaze that I made ended up tasting really bitter, almost like a coffee. It was also very thick and not pourable like the recipe said. I made a second batch and it became more smooth, but it still had the coffee taste. The bitter taste might have been because of the unsweetened cocoa powder. I decided to just keep it and put it on the doughnuts and it applied nicely and looked good. It tasted okay when it was on the doughnut.


Have you guys ever tried to make something and it didn't come out how you wanted it to?

Sunday, December 17, 2017

Hello Cupcakes!

I love to bake when I have free time so I made some cupcakes. Baking is a fun hobby because you have fun making the food and then you feel proud of yourself for actually making it. However, my favorite part of baking is getting to decorate the food. For my first blog I wanted to start of easy and bake simple vanilla cupcakes and on them I used vanilla frosting, gel icing, sprinkles and paper decorations. I let my siblings decorate most of them since they're younger and it's more fun for them.


Now, you may think that icing a cupcake is easy, but it isn't! In order to get the frosting to look pretty, you have to use lots of techniques. The book Hello Cupcakes by Karen Tack and Alan Richardson has lots of tips for spreading frosting, it says, "Creating  a perfectly smooth or nicely swirled top is a cinch. Your aim is to spread the frosting up to but not over the edge of the paper liner and to glue down the crumbs in the process. Hold the cupcake by its paper base in one hand and grasp the spatula in the other. Spread the frosting with a clockwise motion, while turning the cupcake counterclockwise." (Tack, Richardson, 10) This helped me a lot because I would usually just use a spoon and spread the frosting but because of the book i realized what i was supposed to do and my frosting abilities improved.

They tasted delicious! This time the cupcakes were fun and silly but don’t worry, next time the cupcakes are going to be more serious and creative. :) 

Have you ever baked cupcakes before? And how did they turn out?


Richardson, Alan, and Karen Tack. Hello, Cupcake! Houghton Mifflin, 2009.

Tuesday, December 5, 2017

Classic Birthday Cake Cupackes

Classic Birthday Cake Cupcakes

With my last cupcake, I went the chocolate route, but today I decided that I'll go on the other end of the spectrum and go with the vanilla. This recipe is used for cakes, but I used the batter to instead make some sing serve cupcakes. On page 206 of the book "The Williams-Sonoma Baking Book, the Essential Recipe Collection for Today's Home Baker", the recipe calls for:
  • 2 3/4 cups of all-purpose (plain) flour
  • 1 tbsp. baking powder
  • 1/4 tsp salt
  • 3/4 cup unsalted butter, at room temperature
  • 1 3/4 cups sugar
  • 3 large eggs, at room temperature
  • 2 tsp pure vanilla extract
  • 1 1/4 cups buttermilk
  • Vanilla frosting
Recipe for Vanilla frosting:
  • 1 cup room-temperature unsalted butter
  • 4 cups confectioners' (icing) sugar
  • 1/3 cup heavy (double) cream
  • 2 1/4 tsp pure vanilla extract
  • 1/4 tsp salt
Flour Mixture
Firstly, I whisked together the flour, baking powder, and salt until well blended. In another bowl, I used an electrical mixer to beat the butter until smooth, but I over beat the butter which caused the cupcakes to turn out spongy in the end, so a piece of advice is to make sure you beat on medium speed and stop sooner rather than later. I then slowly added in the sugar and continue beating until well blended 
Batter
and fluffy. After, I added the eggs one at a time and beat well after each egg. I then beat in the vanilla followed by the flour mixture in three additions, alternating with buttermilk in two additions, and beat on low speed. 


Cupcakes baking
After I beat the mixture well, I poured 
the batter in the cupcake tins and pop
them into the oven for about 15-20, or until the toothpick I put in the 
cupcake comes out clean. I let them cool for 5 minutes before I started making the vanilla frosting. 
Cupcakes out of the oven


Frosting
I put all the ingredients in a bowl and beat it until well mixed and fluffy. I put the frosting into a pastry bag and piped the frosting onto the cupcakes. 

Piping out frosting onto
cupcake


 In the end, I think           there was too much   butter needed, so I advise if you are   making these cupcakes, you use less   butter than required. These cupcakes   were good, as are any cupcake, but I   would not use this recipe again or retry after I have more experience baking. 


If you have ever made any cupcakes, have you ever made any mistakes during the process? Or if you haven't baked any cupcakes yet, do you plan to? What flavor? 


Thursday, November 30, 2017

Devil's Food Cake into Cupcakes


Devil's Food Cake Cupcakes

This recipe is used to make a cake, but I just poured the batter into some cupcake liners and popped them into the oven to make some yummy chocolate cupcakes. The recipe comes from the book, "The Williams-Sonoma Baking Book, the Essential Recipe Collection for Today's Home Baker" published in 2010. On page 152, the recipe requires:
  • 2 1/3 cups of all purpose (plain) flour
  • 1 cup unsweetened cocoa powder, sifted
  • 1 1/2 tsp baking powder
  • 1/2 tsp baking soda
  • 1/2 tsp salt
  • 3/4 cup unsalted butter, at room temperature
  • 2 cups firmly packed light brown sugar
  • 2 tsp pure vanilla extract
  • 4 large eggs, at room temperature
  • 1 1/2 cups buttermilk, at room temperature
For the frosting (I just used frosting bought from the store):
  • 12 oz bittersweet chocolate, finely chopped
  • 1 3/4 cups heavy (double) cream
  • 1/2 cup sour cream
  • Pinch of salt
Flour, cocoa, baking powder,
baking soda, and salt mixture

First, I sifted together the flour, cocoa, baking powder, baking soda, and salt in one bowl and set it aside. In another large bowl, I used an electric mixer on medium speed and beat the butter until smooth. I gradually added the brown sugar into the butter and continued beating it until it turned smooth.


Butter with brown sugar
Adding in the flour mixture

I then beat in the vanilla extract and added the eggs one at a time, making sure to beat well after each addition. After I beat in the last egg, I added the flour mixture in three additions, alternating with the buttermilk in two additions. I mixed them in on low speed. When I was done mixing the batter, I poured
Finished batter
Cupcakes in the oven
the batter into the cupcake tins and popped them into the oven at 350 degrees for 15 minutes, or until when you poke a fork into the cupcake it comes clean. When the cupcakes were done, I took them out and let them cool for 5 minutes before I frosted them (a mixture of vanilla and chocolate frosting for the right amount of sweetness).
This baking experience has made me more knowledgeable on baking cupcakes, and it made me realize I need a lot more practice before I can master the art of making cupcakes. The cupcakes in the end turned out great, and I'm looking forward to making more favorable cupcakes.

What is your favorite flavor of cupcake/cake  flavor and would you guys ever dabble in the baking world?