Thursday, January 4, 2018

Beauty How-to: Glam at the Tips of Your Fingers

Smoky Eyes

I n t r o d u c t i o n

Do you ever feel like you want to add an extra umph to your look? A great way to take your outfit, hair, and makeup to the next level would be adding a gorgeous pop of colors on your eyes. But, if you're a beginner with not many brushes or tools, or if you're short on time, I'm here, along with the aid of Michelle Phan, beauty-guru and author of Make Up: Your Life Guide to Beauty Style and Success -- Online and Off, to help you create a sultry smoky shadow to add definition to your eyes with your own easy-access tools-- your finger-tips!

S t e p  O n e :

You always want a strong foundation to build off of, and no, I'm not talking about actual makeup foundation. Before applying any eyeshadows, you want to prime your eyes. There are options such as products especially made for priming your eyes, which help the eyeshadow adhere better and also making it longer lasting. There are some eyeshadow primers that are especially made for glitter shadows, in which it is more tacky and bring more opacity for the eyeshadow. But, if you don't do eye looks very often and wouldn't use those pricey primers as much as you would want, another alternative to purchasing an eyeshadow primer would be using concealer! I use this trick all the time to add coverage and a base for my look. Then to make sure there will be no creases, set your primer with a powder that is similar to your skin tone or slightly lighter. To do this, you can use an eyeshadow, powdered foundation, or even some translucent powder.


S t e p  T w o :

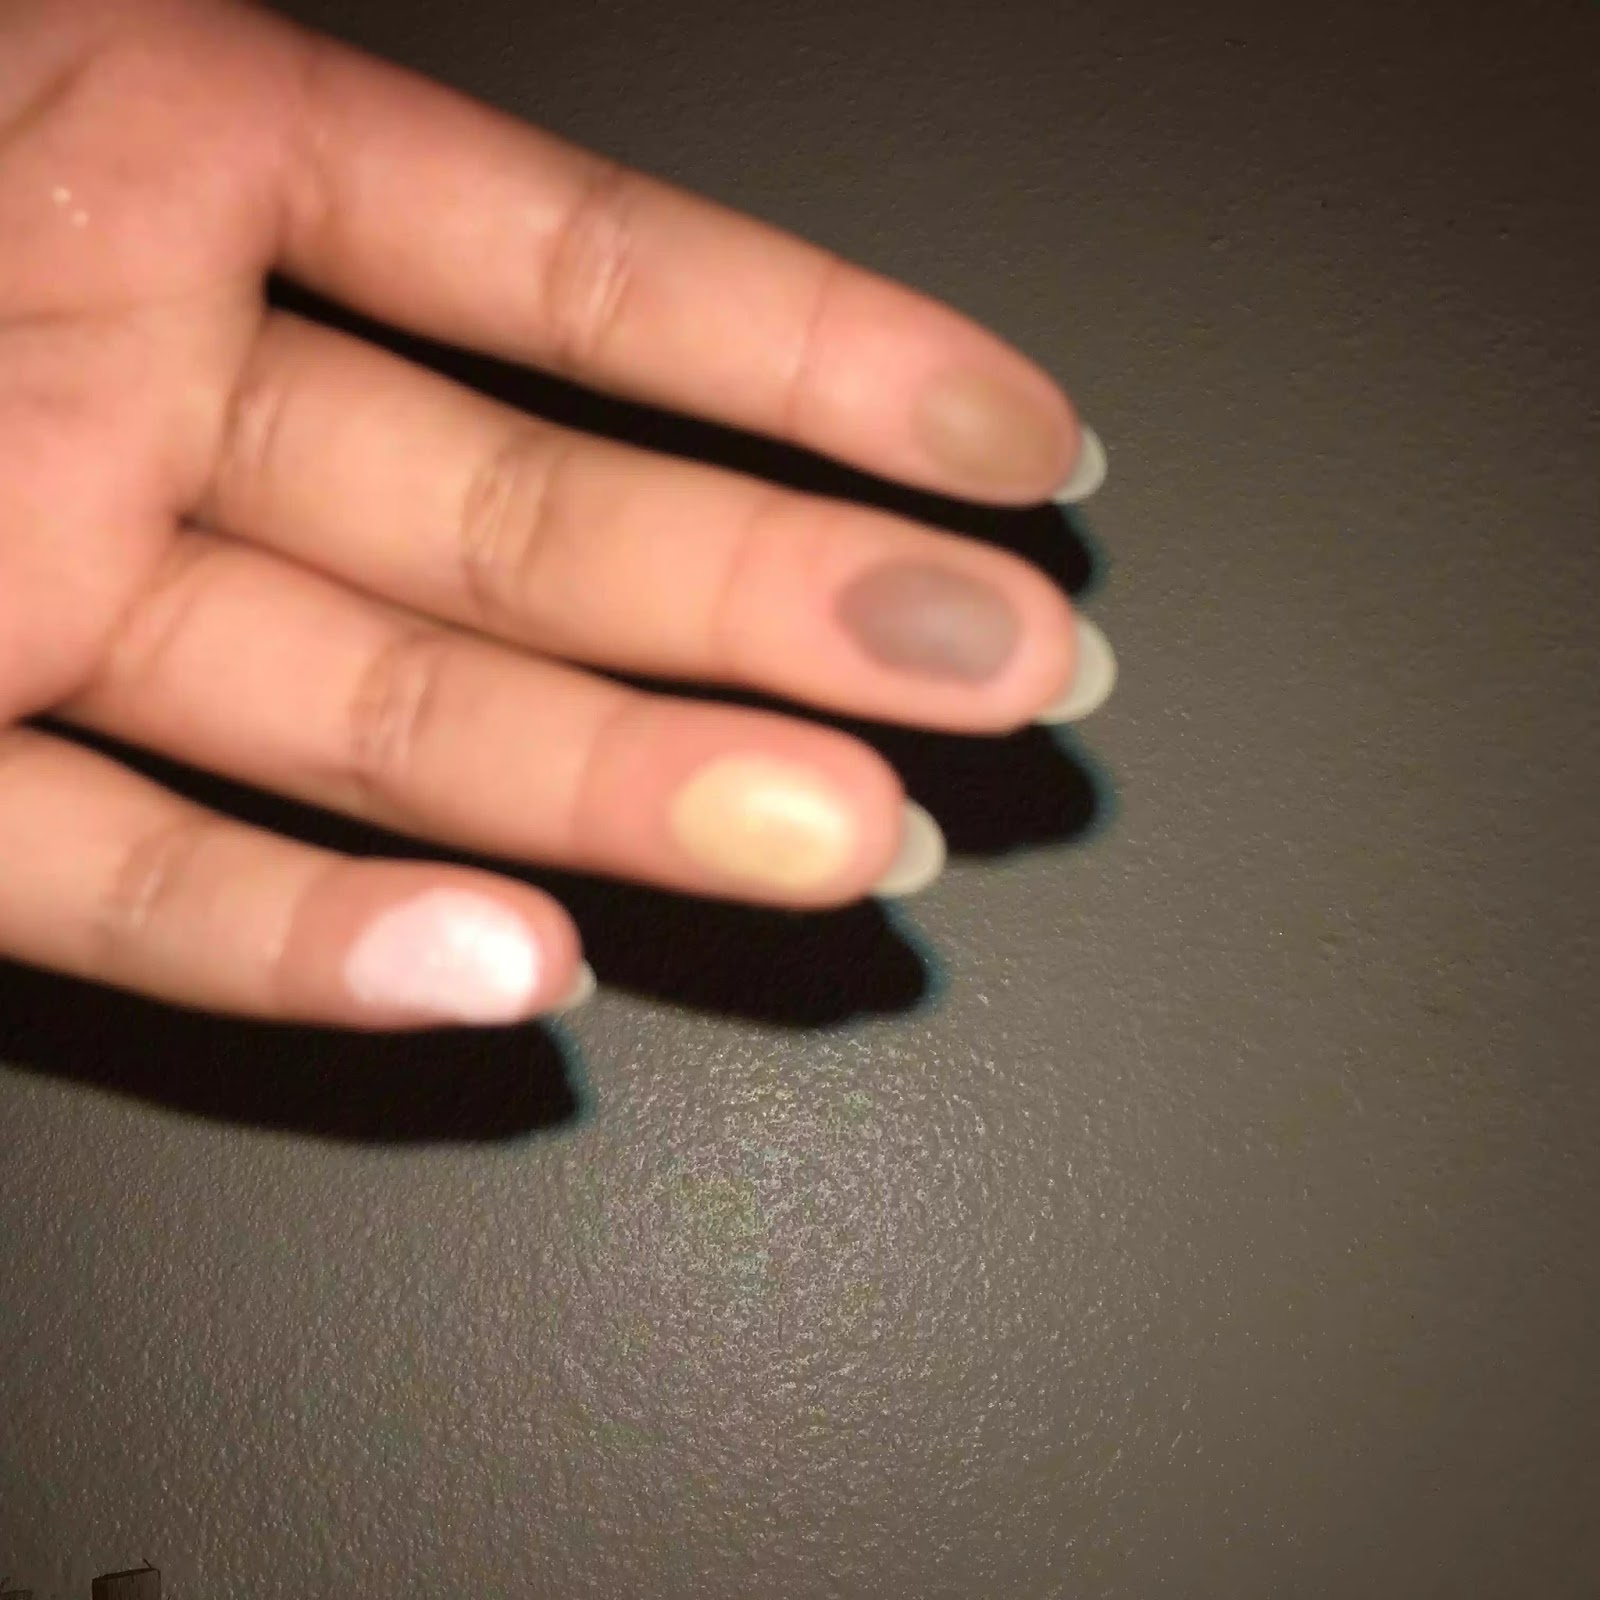
Now time to build up our smoky eye. First, you want to lay down your base color, which typically is the lightest color aside from the highlight color and your skin base. Pick up the shadow with your ring finger, according to Phan's novel, "Your ring finger is the most delicate finger," (Phan 52). You will also go back in to blend all the shadows with the same fingers. This color will add a slight pop and will help the other shadows come together to look blended seamlessly. Bring up the shadow all the way to above your crease, you can call this your transition shade because you will be able to go back and forth with this shadow to add softness into your sultry smoky eye. When you've built up your desired opacity for your base and transition color, you can move on to defining the eyes.

S t e p  T h r e e :

Now we're gonna start adding in more color to bring in that smoky look that we want. This color will be slightly more of a darker brown, a warm tone. You will want to pick this up with your pointer finger, in which the book states; "The index finger provides the most control, so use it to contour," (Phan 52). The amount of control that the index finger has brings a lot of preciseness, which is good for creating a shape for your eyes, and like the author said, to contour and add depth. You want to place the shadow near the outer-corner of your eyes, and have it angled towards your brows. Then, start to bring the color more towards the middle of your eyes and in your eye crease, blending as you take the colors across the lid. Continue to blend the shadows until it looks seamless and a flawless gradient.
S t e p  F o u r :

Our creation is starting to come together, and we're gonna continue to add more shadows to make the look feel more sultry and smoky. As one of our final steps, our book guide states that; "The middle finger is for the darkest color," (Phan 52). So, we're going to take our deepest brown shade and place it on only our outer-corner. Then, blend out into the other colors to continue the seamless finish. Build up the darkness into one corner and the smoky effect will begin to come together.

S t e p  F i v e :

Now that we have built up all our colors and created a sultry look, we are going to add the finishing touches-- see what I did there? To finalize, "Use your pinky finger for the lightest shade, which will be your highlighter," (Phan 52). Take an eyeshadow that is bone-colored, or something that is light enough but won't be too opaque, you want this highlight to look effortless and just to add a little something to finish off the look. Shimmers and actual highlighters would look beautiful and add that special something to top off your makeup, but matte shadows would also add a bit of a natural finish to your eye makeup. Either decision would look gorgeous!

F i n i s h e d

Would you have ever thought that creating an eyeshadow look could be so easy, I mean, it is at the tip of your fingers! It may be a little messy, but trust me honey, the picture-perfect finish is worth it. What other colors would you try for this look? Do you prefer a matte look over shimmer and glitter? Let me know your thoughts down below!

Phan, Michelle. Make up: Your Life Guide to Beauty, Style, and Success--Online and Off. Harmony Books, 2014.

a plethora of polyhedra in origami part 3

Origami

Origami: Octahedron

A plethora of polyhedra in origami Pg. 16


The octahedron is a 8 sided diamond. it is an intermediate project and is composed of a total of 20 steps, I found this one to be more difficult then the other ones and was much more time consuming but the end result was satisfactory.  


Wednesday, January 3, 2018

Sorting and cleaning up your closet

Your bedroom is a place of comfort, style and a calming setting. Your closet is a place of color sorted and put together specifically in order to find what you are trying to wear. I'm not going to lie, my room can get very messy; even for a person who loves sleek, minimalism and a daring color palette. For some reason I believe items you own have a place in your home. When you shop for décor, clothing, furniture, you typically buy because of the look, the aesthetic, and sometimes the low price, but this is where you and I become two different people. I shop and I couldn't care less about lower pricing. I care about where the object or clothing may go. If I shop, I make sure space is available for that newer item. Your bedroom is where you can truly express yourself by the colors on your wall to the small sentimental gift given to you from family. A bedroom may seem like a place that doesn't need to be cleaned. you normally have a guardian say "clean your room, family is coming for dinner!" and your instant smart comment revolves around you saying "I didn't know dinner was held in my room." well it doesn't have to be but I've noticed over the years, as my room becomes dirtier, I become a little more moody, I tend to feel disorganized but when my room is picked up and organized I find myself calm, relieved and at peace.

A closet should be the place in your room that feels great, a place that's very clean, put together and very little items in sight. My closet consists of my shirts, jackets, and sweaters hung, jeans and leggings folded on a wooden stand that holds extra clothing that is seasonal or even items that I do not have hangers for. Of course I have shoes on the floor that can easily get messed up as I do not always put things back where they belong. I also have shelving above where my hangers are, and this is were my cleanness takes a turn. Above the hangers I have an array of duffle bags and a container that holds crafts. May not seem to unorganized but its definitely not the neatest. During the week you typically have your laundry washed but you don't always have the motivation to hang it or put it away. So the basket of unfolded clothing, well doesn't always leave the basket and as the week carry's on you find yourself mixing the clean clothes with dirty clothes and/ or the clothing lands on your floor and soon after your room becomes an obstacle.


In this first photo, this is what my closet looks like when I forget to have a laundry day. My closet can normally be the first to collapse into a complete mess. This may look like it requires some hard working hours but not gonna lie, I worked for about 45 minutes and to be honest, these simple steps im going to show you will be the best way to organize and clean up a closet.


The first step is to pick the clothes up off the floor and make piles. These piles consist of putting dirty clothes into a basket, maybe even a pile of dirty towels and a pile of jackets that need to be hung. Piles really help in any case when you are cleaning. Piles can be an easy way to make your cleaning process go smooth and it's much easier to figure out where the stuff may go. You can always have piles for trash, charity and miscellaneous. 
As of now, your piles are put aside and your floor is officially visible. this is where I like to move in sections. I went straight to the unorganized shoes and even where trash laid from Christmas presents. I grabbed a trash bag and threw in the unneeded scraps of garbage and recycled unneeded boxes. I went ahead and took my shoes and organized them so each pair could be seen and easy to grab when running out the door.
 The last thing I did was wash all clothes and I went ahead and hung everything up and folded my leggings and jeans. This was not going to be a huge cleaning day where I really dig deep and get rid of a lot of clothing and other stuff. this was more of a sort out and pick up which was a simple but yet effective way to show how easy it can be to clean in 3 steps under an hour.

my question to you is, what is your mood when your closet is disorganized?


Running Without Injury: Picking a friendly surface

Ellis, Joseph. Running Injury-Free: How to Prevent, Treat, and Recover from Runner's Knee, Shin Splints, Sore Feet, and Every Other Ache and Pain. Rodale, 2013.


Before getting into the main part of the blog, I’d like to give a little background information about me and why I chose this topic.

I love soccer. I love playing it, I love watching it but before my passion for soccer, I really enjoyed running.

Soccer is a very physically demanding sport and if you’re not fit for it, you will get injured. I have experienced this myself. I was plagued with injuries: a hamstring injury in 7th grade, a calf injury in 8th grade, and a calf hamstring injury in 9th grade limited my playing time, as well as my development because I was still relearning soccer after abandoning it to focus on music. Though I still scored in my first season, I could’ve done better, and I could be better today had I not been injured so much.

After my injury in the fall of 9th grade, I realized that I needed to take better care of my body and keep it conditioned to not get injured. And I did just that. I was injury-free ever since that injury and I went through the soccer season in the spring of 9th grade without getting injured. Let’s hope it stays that way. After losing the blistering pace that I once had, I’m trying my best to stay fit to maintain the pace that I do have and even improve on it as being fast is very important in the modern game

While reading the book, “Running Injury-Free: How to Prevent, Treat, and Recover from Runner's Knee, Shin Splints, Sore Feet, and Every Other Ache and Pain” by Dr. Joseph Ellis, I learned some helpful tips and tricks to prevent injury when running.

According to the book, “The best surfaces for running are firm (not mushy or slippery), relatively flat (without camber), smooth (without ruts or holes), and provide some degree of shock absorption. The more angled the surface, the steeper the incline, the harder the surface, the greater are the chances of an injury” (Ellis, 238). This might seem obvious, but this leads onto something eye-opening for me.

“Grassy areas such as golf courses make relatively poor running surfaces. This may surprise some people who choose grass because it’s soft. But grassy surfaces are also uneven. And many of us--more than half the population have some biomechanical abnormality. So, running on grass makes the muscles and tendons in your feet and legs work harder and leaves you more susceptible to injury” (Ellis,238).

I found this surprising and I think it would surprise a lot of people too. I usually run on grass surfaces because they are easily accessible and when everyone first started out running when they were toddlers, they most likely were outside in the park or in an open grass field of some sort so we’re used to this type of surface for running.

Jogging on grass field


When I was jogging on a grass field, it was definitely not flat because there are lots of holes and small lumps and hills. Although it’s soft, it’s unevenness and inconsistent condition makes for a very bad place to be running or even jogging on.

Jogging on tartan track

When I was jogging on the track field or tartan track, which is designed so athletes can compete even in bad conditions. I definitely felt more safe and consistent than on the grass field where I felt like I could’ve injured my ankle by accidentally stepping into a hole.

Have you ever gotten an injury? If so what did you do to prevent them from happening again?


Photography: Guide to taking beautiful Digital pictures, photographs and compositions

By: Nicole Woods


Photo By: Mankinder Takhar


- Rule of Space-

The rule of space is important to remember when taking the perfect picture.
When you are taking a picture the rule of space plays a big role. According to Nicole Woods on page 24," The rule of space will give the illusion of movement and it will also give the viewer a breathing space, especially if the photo is intense(Woods 24)." Breathing space around the picture gives the viewer something else to look at while being engaged in your picture.

Contradicting that over crowding causes the picture to be overwhelming and it may give the viewer a lot to focus on. This will also make it difficult for the viewer to understand what you were trying to capture. Nicole Woods has said in her book on page 24,"...Filling it up means that you have to maximize the space, leaving nothing that is senseless. You have to be careful though, filling the space is different from crowding the frame( Woods 24)." Over crowding your frame can cause mixed emotions about the picture and make it confusing for the viewer to take in.

How do you think the rule of space was used in this picture?

Programming: For Loops and ArrayList

In Java, some of the most common task is to create, store, and manipulate information of a data structure. I learned how to use classes and methods built into Java to write these programs. To start off, manipulating a data is very common and Java provides control statements to make a task run repeatedly. The controls statement I learned is called a for loop. Just like a loop, a for loop runs a code repeatedly until the condition is met. In the book it says, "the for loop is the workhorse of the repetitive loop structure because it's easy to create, easy to debug, and easy to understand" (Mueller 187). Here is an example of the code.


In this line of code, it shows that the initial number starts at 0. Then I wrote a Boolean statement and so if the initial number is less than ten, then it will evaluate the expression as true which will result in the number to be added by one. Since this is a for loop, the code will repeat again and again until the statement is false. For the statement to be false the number would have to be greater than ten. So, here is what the output will look like.

The next thing I learned was ArrayList. An ArrayList is used to store a list of data. The ArrayList is a pre-defined Java class so it is written in a certain way. An ArrayList is written out like this: “ArrayList<Integer>” followed by any object that is created. With ArrayList, it can be used to store data such as integers and to do this, you would write out the object name followed by “. add” and then put the number inside the parenthesis. I created an ArrayList with the object name of “batteryPercentage”. I then added a list of number and it looked like this.
Now that I have a list of numbers of my “batteryPercentage” stored in the ArrayList, I can use an element’s index to access them anytime. An element’s index is the location of the numbers in the ArrayList. So, the first element in my ArrayList is the battery Percentage of 100 and it is at the position of 0. If I wanted to access the batteryPercentage with the value of 95, I would write out the code like this.

Lastly, to add another value to the array list it is slight change to the “add” method. To insert another value, it would be written just like the “add” method we’ve seen in the previous pictures, but you would write out the position of where you would want the new value to be placed into the list before putting the number in. So, if I wanted the “batteryPercentage” with the value of 50 to be placed in the ArrayList at position 2, the code would look like this.

The position of the other value will shift one up or one down depending on where the new value is placed

           To sum it up, for loops help manipulate the entire data structures and ArrayList is used to store specific data. For loops are helpful to program computers to perform a certain task repeatedly and ArrayList can be used to help organize the data structure and makes it easier to access certain values. How do you think for loops or ArrayList can be helpful when writing a specific program?

Mueller, John Paul. Java eLearning Kit For Dummies. Wiley, 2014.


Tuesday, January 2, 2018

Origami animal - sea lion 


making a origami sea lion is fairly complicated so i would like to help you guys make a sea lion. enjoy! (origami is very decorative so use any type of paper/paper color you'd like)

 (2) paper over & fold the left and right edges to the middle..
(1) crease a square piece of paper diagonally and turn the..

(4) now that you folded the top unfold the top part & start..

(3) now fold the right and left edged starting from the top.. 


 (5) lift both inner corners so that they meet in the middle..
(6) this is what it should look like after you do both sides.


(7) fold the paper making sure that the wings are sticking out
(8) fold the wings down making sure that it looks like this.


(9) fold the bottom part inwards so that its between the papers
(10) turn the paper horizontally and do the same for the head


(11) at tip of where the head should be fold it inwards like so


(12) do the same kind of fold where a sea lions beard should be and your done.
and thats how you make a sea lion. i hope you guys enjoyed and stay tuned for more origami animals.


Zulal Ayture-Scheele. Beautiful origami. Sterling, 1990