Monday, January 30, 2017

Photography - Shutter Speed

Shutter Speed - Gatcum, Chris. The Beginner's Photography Guide, 2nd Edition. New York: DK, 2016. Print.

"The shutter speed you can use have a profound effect on the resulting image."

I tend to play around with shutter speed a lot. It gives you the ability to change how you want your picture to be portrayed, whether or not it is clear or slightly blurry or completely blurry.
"Action may be captured in very sharp detail, blurred to convey a sense of motion, or even reduced to an abstract smear of colors."
Anyone is able to change whether or not they want to portray movement in their picture.

"The precise effect you use is going to be a technical and/or creative decision, but the mode of choice is Shutter priority: you select the shutter speed and the camera will set a suitable aperture."

In this first picture, I had a slower shutter speed than I needed to have. It created a blur among the car lights. This was a creative decision from myself.


In a different photo, I chose the "correct" shutter speed, which ensures a clear photo, with the right shutter speed and aperture.

This picture was taken in the same car, within a couple of minutes of the picture above that was taken. I had simply chosen a different shutter speed, along with aperture, to make my picture clear as well has to bring a different mood to this picture.

Thank you for viewing my blogpost! If you had to choose between taking only motion photos or clear photos, which would it be?

Drawing: Shading and Tones

This is my last blog post for about drawing and I'm going to be touching over something that I felt like I needed a lot of work on which was shading and tones. Tones are basically like how hard you press down on with your strokes to either create lines or shade into the characters and knowing when to use what kind of tone in invaluable.
Start

Tonal Bar:

So, I'm going to be using this picture that I emulated in my last blog post to practice my tones and shading on. So, one of the first things to do when work on tone is to create a "tonal bar". This is how Dodson describes a tonal bar, "Use the point or the side or both to get the results you desire. Build up to the tone slowly and watch out for the common tendency to go too dark or too light" (Dodson 120). This exercise helps with using the correct tones by being able to see the entire range of tones, they you're able to create. The first thing I placed on my paper before even starting to shade was placing the tone bar which can be seen on the end result because Huy was a little stupid and didn't take a full shot of the paper.

Edges:

Shaded the hair
Added Edges
The next think about mastering tones and shading is learn the differences between soft and hard edges. The definition of the two different kinds of edges as described by Dodson is "Hard edges is one of the a sharply defined border; a soft edge gradually disappears" (Dodson 121). This is really important to know since, some aspects of shading requires me to separate shapes from each other which is where hard edges come into play for me. And when I need to draw like a smaller detail, I can make is more subtle but using a soft edge since it gradually disappear. So when I applied hard and soft edges to the drawing, I didn't use very much soft edges, but applied many hard edges to distinguish what the different parts of the picture from each other. And used a little bit of soft edges for the hair.

Process and Thoughts:

Pre-Arm Change
For the rest of the shading, I just followed the guide lines that was put in place by the tonal bar and just continued shading. I had no reference for shading but merely just from experience I was able to create the shading that you see in these pictures. I notice near the edge of hair is often more heavy shaded so thus, I do so on my shading. Also, on the little bow, I wanted to give a sense of light so on one side a shaded it slightly heavier and gradually go to lighter tone for that effect of light. After, that my drawing was basically finished. but using the skill I learned in my 2nd blog post, I said to myself "Wow that arm looks funny" and changed it not look as funny. This is probably the best thing I've ever created and I'm extremely pleased with the result I got.

Bonus Point: What does the Japanese Say?

Questions: What were some skills and things you learned over the course of the IRP?

 Source: Dodson, Bert. Cincinnati: F&W, 1990 Print.

Final Result
Post Arm Change

Drawing: Copying and Emulation

This is my fourth blog post and it's about emulations and copying, which holds a vast amount of benefits to anyone that is getting started with drawing. The differences between copying and emulations is copying is just like drawing the exact image as a masterful artist by tracing over the image or drawing the images based on observation. And emulations is drawing a similar things a artist has drawn, but it's like adding your own little twist on it or like changing some key differences to make the images your own so, you still had a very similar experiences in making that piece of art as the original master artist.

Copying:

The basis of copying and how it works can be described as the types of experiences you have when you're in a room with someone with much higher skill than you but, because of their high skill it also drags you along with them and make you tremendously better at that skill. So, the example Dodson gave was his friend was right behind a good skier and she just felt dramatically better at skier just in the presences of the master (Dodson 56). So, basically with copying you're going to go through the feeling and sensation of the master artist when copying their piece of artwork. And being able to just experiences what the professions feel can really help a beginner to understand the mind states of the artist they're copying by like questioning why the artists are making these very exact strokes and they get the feel the "handwriting" the artist use to develop their own sense of style.

Emulating:

Emulating even though very much like copying, but is basically going one step higher than copying to create you own piece of artwork that can have inspiration from all sorts of master artist. The most important benefit of emulating is the acquisition of your own handwriting which is basically your "style" or like certain technique that you develop to make the artwork specifically your's. Dodson said basically by observing and studying an artist that you like then, you'll slowly get the sense of handwriting and develop your own based off their already acquainted handwriting (Dodson 57). Developing your own "handwriting" is important for drawing because it's basically how you differentiate your sense of drawing from another person's which makes drawing really special since everyone can have a different way of drawing something and all of they can end up looking spectacular. Also, the feeling of creating your own artwork based another artist's established handwriting just enables you to developed your own feeling and sensations for each stroke you make and every line you place down. Overall, both methods just really an artist developed their unique sense of style or "handwriting". 
The picture to the left is my emulation of a character. And it really improved me personally since, I'm more into drawing cartoony characters and just emulating the artist just really helped me established my own sense of style.

Questions: What other applications do you think copying can enable a person to improve upon a skill? 

Source: Dodson, Bert. Cincinnati: F&W, 1990 Print.

Drawing: Individualizing

For my third post I'll be talking about individualization which is giving like specific characteristics that allows minor differences in drawing. This is often exercised by the creation of two eyes to practice giving individualization due to how the eyes have to be similar looking and almost symmetrical but, need to apply minor differences in the drawing to individualize the two eyes from each other.

How to Individualize:

As with most things that involve artistry, it takes a lot of practice and experience to masterfully learn individualization and execute it with the utmost of detail, but there are some tips that can help with mastering Individualization. The first tip Dodson provided us is to break your old viewing method as an artist and start to view drawings with less logic and more curiosity (Dodson 22). This is because if we constantly view and image with logic then, we can never understand fully why the image is like this or like that. But, instead we just look at the complex shapes depicted within the drawing and we're unable to comprehend the reasoning the artist drew it in that very specific way. Viewing with curiosity cures this, because with a curious viewpoint it makes it easier for people to learn and notice the subtle the differences in an drawing. And the curiosity drives the artist's passion of understanding and replicating the same technique. So in the case of individualizing, a logical viewpoint would result in someone just saying an image with no questions. But, a curious one enables the persons to notice the small and little characterizing things in the images such as maybe one side a slightly more narrow or this certain thing is darker. Overall, the way you can view an image can change the whole experience and the way people can understand artistry, 

There's also one more step used to help Individualized which I talked about in my previous post, but it's the use of practical dialogue. As Dodson said, people should use practical dialogue to be able to question the subject (Dodson 23). What that means is basically questioning the subject or the object that someone is drawing allows the person to think of ideas that they make to allow the subtle details that are so important in drawing. Practical dialogue helps create those ideas for the artist to apply upon their drawings without the need of viewing another artist's works.

So, I used the technique of drawing two eyes to express individualization. You can see many subtle differences between the two eyes. maybe a little bit too much but, that's beside the point. 

Question: Do you think it's important to have small and little details to drawing? 

Source: Dodson, Bert. Cincinnati: F&W, 1990 Print.

Sunday, January 29, 2017

Heading the Ball

For my fourth blog post I am going to talk about how to head the ball. Heading the ball can be used as a defensive or tactical play in the game of soccer. In fact, just today I scored a header in my Quarter Finals game of the State cup to secure our lead. Heading is very hard to master and needs practice in order to get the hang of it.


How you can Practice it!

In the book High-Performance soccer by Paul Caligiuri he says "Try this drill to work on offensive and defensive  heading. You and a partner stand on the six-yard line, facing each other. Head juggle a set number of times and then try to jump up and head the ball far over the crossbar. Or head it powerfully and downward on goal."  This drill I've down before and I think it a very helpful drill on practicing your power and accuracy for heading the ball.
Image result for heading in soccer
If that drill doesn't work I always found that a wall can make a perfect partner in a lonely situation. In order to do this drill with a wall simply play the ball up and head it against the wall keeping the ball going back and fourth between you and the wall. This drill is helpful for fast movement and heading the ball with accuracy.

Do any of these drills sound fun to you? Which one would you try?

Cross Hatching

For my final post, I am going to discus a certain technique, known as crosshatching. In my previous blog, I talked about the importance of line, and this technique ties in with the topic of line. Crosshatching is created by using lines going in different directions, and is another form of shading.


Cross hatching is a linear drawing technique that can be used to create texture, value, and the illusion of form and light. When cross hatching is used, the artist may begin adding value as hatching, but then "allow the lines to cross over each other" (Harding 109). What this means is if, for say, you make a horizontal line, then you would make a vertical line to cross over it. The more that the lines cross over each other, the darker the value becomes.

Many artists approach the addition of crossing lines as a science. following a specific order of "vertical lines, followed by horizontal lines, followed by diagonal lines..." (Harding 110). These are the steps that I followed when I cross hatched the fish above. As you can see, there is a pattern that it forms and gives the drawing depth and shadow and produces a more distinct look than normal shading. You can also draw several layers of cross hatch marks, which creates fine cross hatching. This is the richest type of cross hatching, and you can see it in certain areas of the fish.

This method produces very deliberate and controlled marks that are very exact and precise. Others simply cross the lines at random leading to "looser" drawings. Neither way is better, it depends on the composition. Some looser approaches work better for some subjects, while more rigid approaches are suitable for other subjects. To end this blog, I will provide you with a important time on cross hatching. Cross hatching should be drawn "lightly and closely together" (Harding 110). You don't want to make the gap between each line too wide or make it too dark, or else it will throw off the look. I am not the best at cross hatching, and this is all the information I have gathered on it, but I will keep practicing and getting better at it until I master it.

Question: Do you prefer the look that cross hatching creates or regular shading?

Harding, James Duffield. Harding's Lessons on Drawing: A Classic Approach. Mineola, NY: Dover Publications, 2007. Print.

First Touch Push Pass

If you've kept up with my last blog post you'd know I talked about how to defend against a dribbler and how to improve your control with a fun little game. What happens next now? You've just won the ball from the attacker and are now on the counter attack, you play the ball to a teammate and they pass it back to you while making a run to an open space calling back for the ball, what do you do?!


Here are the technical keys to perfecting a push pass!

The First Step!

When you're playing a first touch push pass, you always, always, always need to move directly to the ball at speed. Moving to the ball subtracts the possibilities of a weak pass being played to a teammate or having an opponent catch you off guard and steal the ball first. The more momentum you have on the run up towards the ball the better the pass will be to your player.

Image result for push pass soccer
Second Step!

Make sure that you're light on your feet in case the ball takes a deflection or moves unexpectedly. You always need to be ready to move in any direction during soccer in case something happens with the play or the ball.

Third Step!

Lock the ankle of your striking foot withy our toes pointed slightly upward in the direction you want the ball to move.

Last Step!

Strike the ball in the center in order to get a nice clean pass on the ground to your teammate.


Is this a pass you'd be willing to try in Soccer?

Wildlife Photography

Hi everyone! In my previous post, I broke down aperture, shutter and ISO settings so that proper exposure can be easier to attain. In this blog post, I will be talking about some steps that are necessary for amazing wildlife photographs.

In The Magic of Digital Nature Photography by Rob Sheppard, there are some ideas for where you will most likely encounter some sort of wildlife. Sheppard states that Parks and Zoos are helpful for beginners for getting good shots, because "many wild birds coexist with people at a certain locations and become acclimated to that contact" (Sheppard, 137). National Parks also have wildlife which are accustomed to crowds, because "these animals know they are safe, graze, go through mating calls, and other behavior not far from the main roads" (Sheppard, 137). Here, it's especially important to treat the animals with respect and know where it is safe to take photographs. If you don't want to go outside for very long, "set up a bird feeder outside of your home to meet and photograph the resident and small mammals of your area. You can place feeders near windows so you can photograph from inside" (Sheppard, 137). Nature centers are also good places to go because they have blinds, boardwalks, trails, and more for taking photographs.

Within the places listed in the previous paragraph, you can look for food, water, edges, regular paths and perches. Where there is food, you may be able to find some animals feeding, or if you wait a little, then you may find an animal approaching the food to eat. "In areas where water is scarce, a water hole is an animal magnet" (Sheppard, 138). Even in water abundant places, animals most likely be by the water source. Scientists have seen that most wildlife is found along the edges of habitats, because they use edges for movement, safety and feeding, Animals are also habitual, so they take the same paths over and over again. If you follow animals on a certain path at a certain time of day, then you can most likely encounter them in the same place at the same time the next day. The same concept applies to birds and perches. Birds visit and use the same perches over and over again, similarly to animals using the same paths.

It's important to know the behavior of your subject when you are taking photographs of wildlife, because within context of certain factors, each animal behaves a certain way. Animals have an "invisible circle of attention around them. If you are outside of that circle, they are relaxed and go about their normal business. If you get near that circle ... they become more alert and stop doing whatever they were doing" (Sheppard, 140). Animals also use their best senses differently to stay alert for danger. A mammal has poor eyesight, but have amazing hearing and smell, so they pay attention to different sounds and smells. Birds have amazing eyesight, so they are more visually aware of their surroundings.

When taking the photograph, it's important to know how to approach the animal, so it's best to know some stalking techniques. Make sure to be prepared by having the appropriate lens, proper focal length, etc. so that you can instantly take the photograph when you are in position to take a photograph. It's best to move slowly without sudden movements. "Your movement needs to be like that of a non-predatory animal, like a deer or a cow" (Sheppard, 142). Also, predators move in a straight line, so when you are approaching the animal, don't move in a straight line. Don't stare at your subject or point your lens directly toward the animal, because only a predator will do so. Observe the animal's attention as you are moving towards it, because if it looks down or away, you can move closer and quickly. Watching your silhouette is also important because the human silhouette is easily recognizable. Blending into the surroundings will help. Since all animals are sensitive to sound, it's best to keep noise to a minimum.


These pictures were taken at Coulon, a lake near The Landing. Here, the most prevalent animals are birds. Knowing that birds are more visually aware, it was important that I didn't point my lense to the bird, or that I stared at it. In the first photograph, the bird was aware that I had already been taking photos of it, so I had to lower my lens to not seem like a predator. In the second photograph, the bird looked forward, so it was easier to get closer to it and take photographs of it. The part that made taking these photographs easier was that this bird, and many others living at Coulon, are already accustomed to human activity in their habitat.

Overall, what wildlife subject has been easiest for you to take? What has made it the easiest?

Bibliography: Sheppard, Rob. The Magic of Digital Nature Photography. New York: Lark, 2007. Print.

How to Reheat your Meals


How to Reheat your Meals

If you have partaken in harvesting (hopefully from inspiration from my blogs) then you may have run into the issue of needing to reheat certain meals. I want to tell you that you can reheat leftovers and make them taste just as good as when they were fresh!


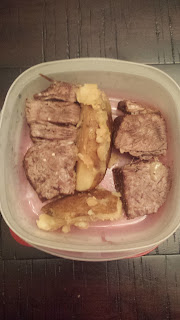
I personally need on the go meals, and infant meat is perfect for this. You can just put it in a tuber-ware container with some kind of vegetable (I chose some potatoes) and bring it with you for lunch. Nobody will suspect its not an ordinary meat. I absolutely love the meat of young children, and for lunch today I brought a roast, as the author recommends: "a young healthy child well nursed is at a year old a most delicious, nourishing, and wholesome food, whether stewed, roasted, baked, or boiled; and I make no doubt that it will equally serve in a fricassee or a ragout." (Swift)


If you are not in a rush and you still want a delectable dinner, this video by Nick and grant Crilly from ChefSteps will show you the best way to reheat meat for the exact same flavor as you had when it was fresh. It will work just the same with human flesh. 

Defending Against The Dribble

In my last post I talked about a way to help your attack, but in this post I'm going to help you practice defending an attacking player dribbling. To become a great player you need to be what players call a "Two-way" player, which means that you're able to attack and defend. It is very important that you can learn the proper ways of attacking and the proper ways of defending in case you get caught in either scenario during a game. Here are the steps on Defending the Dribble in High Performance Soccer by Paul Caliguri.


Step 1:

                 When you are defending  a dribble, you need to have your eyes riveted to the ball at all times. Your weight needs to be on the balls of your feet as you bend down from your knees and your waist keeping your balance at all times.

Step 2:

                You need to be able to move as quickly as possible to the plyer in possession of the ball. If you can slow the player down you gain an advantage over them.

Step 3:

               Get close enough to the player to bring their head down towards the ball giving them less opportunity to scout up at their surroundings. NEVER charge a player as they can easily move out of the way and get past you, always stay close enough to the ball to slow them down but move with them as they run forward.

Step 4:
         Try to keep a foot closer to their player and direct them to a position that will minimize a risk to your team. When the time is right either catch them off guard or wait till they get nervous enough for you to win the ball back and start a counter attack.
Image result for defending in soccer


Do you think that this is a good way to defend, or are there more effective ways?

Oh What Candy Can Do!

Oh What Candy Can Do!

Through the years I have learned how parents are not as protective over their kids as they used to be. They will turn their backs on them in public places, and let them run into forests for hours alone. About 10 months ago I went to a spring carnival and I really got to see the full potential of parental idiocy. As Swift says: "Infant's flesh will be in season throughout the year, but more plentiful in March, and a little before and after." (Swift) so I happily went to find more to harvest.

When I reached the carnival around 6pm, there were many children running around,  but they were in too much a hurry for me to gain their attention. I however did find a little toddler that was in the perfect condition. The father of the 2 year old was paying for food in line and completely turned his back on her. I took the chance of seeing how easy it was to lure the child for the chance of some more tender meat. I put a brightly colored lollipop in between my hands and rested it on the small of my back, and slowly walked away. The child obediently followed! Oh what candy can do!

I live nearby a forest, and small children come almost every day to play. News reports of how children often go missing in that forest still are not enough for parents to bother with apparently. I obtained a juicy 10 year old from that forest just 2 weeks ago and I still have so many leftovers!

With all these leftovers, I just freeze them and they stay good for a very long time. I highly recommend this, so you do not have to waste any bit of these delicious beings! 

New Views

                                           Book's Reference Photo

Face to Face

Seeing as this may be my last post I wanted to not only put in my last efforts to try and create at least an outline of a portrait, but an animal drawing as well. As seen in the photos I started off from a picture of a woman with a layered grid atop the photo. Using a grid did make it easier for me to draw the picture in different parts. It also allow me to be able to not be too overwhelmed by the picture's entire layout. Though the grid did make this whole process a lot easier, I still did find trying to capture the likeness of the photo onto the paper to be quite a challenge. I found it really frustrating to convince myself that I hadn't totally messed up the photo but as I drew in the lines and read the book (Lee Hammond's Big Book of Drawing) I saw it read "I know it looks funny (with the grid lines), but it helps keep things in the right place. Take your time and strive for accuracy." (Hammond 49). So from that helpful advice I continued to finish my outline but I didn't think I was ready to start filling it in just yet.

Seal of Approval

Since I didn't go further on my portrait drawing I decided to take a break from people and promote myself to start drawing animals. In my book when it comes to good animal drawings it states "The trick is using the dark areas and light areas together to create shape and blending to create realism." (Hammond 70). So basically when going about this it's best to know what shapes you're working with when drawing a certain animal and identifying the lighter and darker areas to achieve effective realism.

Seal Drawing
Towards the right you see my first drawing of an animal which happens to be a seal. I really enjoyed drawing such a cute and adored animal, but that wasn't necessarily the only reason I started with it. I believe the book starts out with this specific animal in order to get the reader better accustomed to learning how to shade animals. With this animal especially, it's an essential component to make it look real. Though I am now working with drawing an animal, similar components of drawing people still come into play like with the shaping of eyes and shading.

Closing

It was really interesting to not only attempt my first real portrait while trying to learn and apply the realism techniques I've learned. I also really found a joy in drawing animals which I look forward to continuing in the future. My question to you is if there was anything that you would be willing to learn to draw realistically, and what would keep you motivated to keep trying even if it didn't come out right the first few times? Thanks for reading and feel free to leave a comment below about any questions or critiques that you have, all of it is welcome!

 Hammond, Poly Lee. Lee Hammond's Big Book of Drawing. First ed. Cincinnati, OH: North Light, 2004. Print.


Decluttering and Organizing: Pt.5 Confidence

Pt. 5: Gaining confidence in life through the magic of tidying.

This concept may seem a little weird and you may be wondering "How would I gain confidence through tidying?" When you have a tidy room that you are confident in, it in turn boosts your self confidence. How do you feel when your room is messy? You probably feel lazy and sluggish, I know I do, and I have no passion to clean my room because it seem like too much work. But when your room is organized and tidy, it makes you feel more spontaneous and motivated.

"When it comes to the things I own, the clothes I wear, the house I live in, and the people in my life, when it comes to my environment as a whole, although it may not seem particularly special to anyone else, I am confident and extremely grateful to be surrounded by what I love, by things and people that are, each and every one, special, precious, and exceedingly dear to me" (Kondo 180). 


"Discard anything that doesn't spark joy" (Kondo 181). When your room is clutter free, you start to appreciate the things that you have more. The belongings in your room start to have more value and purpose. You want to create a space that you feel the most confident in, a place that sparks joy in your life. For me I personally love fashion, art music, and books. You can still decorate your room in a tidy fashion. When i hang posters an pictures on my walls, I make sure to leave at least one wall relatively empty to create a cleaner looking space. I also organize my books by series so that it looks more pleasing to the eye. These are the things that I love to surround myself with, the things that spark my joy, the things that are special and dear to me. 

Question:

What do you decorate your room with? What are the things in your room that spark joy in you?

A little Popcorny :)

Popcorn Balls

I chose to make this for my last blog post because I felt like it was a really fun dish to share with you all and it would be cool to try to make! So without further ado here are the listed ingredients: 

Ingredients:

-3/4 cup light corn syrup
- 1 cup margarine
- 2 teaspoons cold water
-2 teaspoons cold water
-2 5/8 cup sugar
- 5 quarts plain popped popcorn

After gathering these ingredients which took awhile due to the process of popping all that popcorn with our handy popcorn machine as pictured below:
popcorn machine for premium popping :)

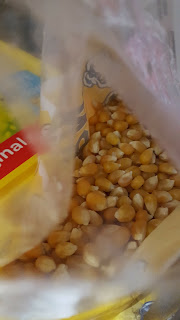
Popcorn kernels before popping
  I following the books instructions which stated, " In a saucepan over medium heat, combine the corn syrup, margarine, cold water, confectioners' sugar and marshmallows. Heat and stir until the mixture comes to a boil" (Meredith). Then, to paraphrase my book it said to mix the popped popcorn with the hot mixture. Here are some pictures of this step:
Corn syrup and others heating
Mixture being poured over popcorn

The next step was to mold the popcorn into balls with my hands the book said to keep cold water by so the popcorn didn't stick to my hands . Simple right? Well after many attempts including adding dry popcorn it wasn't forming. But here is a picture of the final bowl of popcorn:
popcorn that sadly wouldn't form

 Overall, even if the popcorn wasn't going into a ball shape we could still enjoy it so it wasn't quite a lose. Plus I had fun when I opened up the popcorn machine thinking it was done only to be shot at by flying popcorn ! 

Question: What has been your funniest experience with baking/ trying something new?

Decluttering and Organizing: Pt 4. The Magic

Pt. 4: The magic effect of tidying up.

Tidying isn't just about cleaning up your room, it's life changing. In Marie Kondo's book, The Life-Changing Magic of Tidying Up, she talks about how one of her client literally changed her way of life. "The lives of those who tidy thoroughly and completely, in a single shot, are without exception are dramatically altered" (Kondo 178). One of Kondo's clients had been messy all her life, but after trying Marie's methods, her life took a turn for the better. 

"One of the magical effects of tidying is confidence in your decision-making capacity" (Kondo 178). By getting rid of the things that you don't need, it strengthens your decision-making. It allows you to not be as attached to material objects, and useless memorabilia that you really don't need. 


Question:

What does your room look like? Is it very simplistic or is it filled with memorabilia?
Volley and No I Am Not Talking About Volleyball


               With a volley, I found that it is a lot simpler and easier to get down versus the rest of the techniques. The volley is very repetitive shot and personally, I was able to get the shot down after a couple practices. Therefore, you will most likely get it down within that same time as well. In the beginning, I would always want to swing at the ball, but with a volley, it is different from the other shots because you should not swing with it and you have to hit the ball in the air before it touches the ground. Typically, this is a shot used up at the net because it is a quick shot that can be very aggressive if you hit it correctly.  

The first thing you need to understand with this shot is that you should always watch the ball when you are trying to make this shot or just with any shot; however I found this to be crucial with this move in particular. As well as, you need to meet your body to the ball when you want to do a volley. The book “The Top 100 Best Things That You Can Do to Greatly Improve Your Tennis Game” said, “Controlling volleys is a lot easier if you meet the ball before it has reached your body. It is very difficult to control a volley if he ball has begun to go past you” (McCloud 32). When you are trying to make this shot aggressive and powerful, you need to fight against the power of the ball coming at you. If you hit the ball when it is still in front you, then you don’t need to reach for the ball, but you can push the ball, which gives you that aggressiveness and power that you need. If you try to hit the ball going past you, then you will have to reach for the ball and make a weak shot back to your opponent making them have the advantage.

Another thing that you need to know in order to master your volley is that you have to make sure you turn your body for the volley. Ace McCloud says, “It is important not to take the ball square on, so be prepared move rapidly to one side” (McCloud 32). With this shot, it is very quick so you have very little time to make a decision on what you want to do, so always be ready to think quickly. You want to move to one side because you have more control on how you angle the ball and you can have a better push motion. If you are hitting the ball straight on you will have no control and it probably won’t go where you would like the ball to go, which could make your shot very weak and help your opponent win the game.

Before, I mentioned how you shouldn’t swing on a volley because with a volley it is a shot made up close, so you have no room to swing, but that’s not the main reason. When you hit a volley, you need to act like your racquet is a “wall”, because you want the racquet to be hard and sturdy like a wall. The reason why you don’t want to swing is because you lose the momentum of the ball when you add a swing to the ball coming at you. If you hit the ball with a simple push of your racquet, you will just push the momentum of the ball going back to your opponent’s court. Therefore, with the push you get the fast and aggressive hit, with just a simple hit.

Anyways, with a volley just remember to act as if the racquet is a wall, always be prepared to shift to one side and have your body face sideways. I really do hope my tips have helped you, if you want to pursue in the sport of tennis. I love tennis and I found that these tips have helped me prepare for the season coming up. Thank you for reading my post!


Question: What do you find is the hardest thing for you to understand or actually do when you do a volley? Like what challenges you when doing this shot?


McCloud, Ace. The Top 100 Best Things That You Can Do to Greatly Improve Your Tennis Game. San Bernardino: n.p., 2016. Print.

Preparing Meats: A Kid-Friendly Recipe


Sweet and Savory Ribs

A Kid-Friendly Recipe


In my reading, I have found numerous inspirations for my next meal. I have been engaged in preparing such meals for 3 years now. Ever since my first taste of this type of meat, I could not go back to eating normal public grocery store meats. This book I have inherited written by Jonathan Swift, was from a relative and the book contains delightful recipes to prepare for all who have the taste for this flesh. Jonathan Swift proposed the idea of “buying the children alive, and dressing them hot from the knife, as we do roasting pigs.” (Swift) Unfortunately there are not many Night Feasters in this city to purchase from, so I ventured to find a vulnerable child past 6:00pm roaming about behind the Fred Meyer. The darkness at this time was enough to be undetected. I particularly chose this child for his small yet stocky stature for the proportions of fat and muscle for a more delicious meal. 

Back in my garage I butchered and separated the ribs and put them into an aging barrel, for Swift recommends " seasoned with a little pepper or salt will be very good boiled on the fourth day, especially in winter.” (Swift) During preparations I kept the seasonings simple with salt and pepper, but also added rub seasoning to give a nice steak flavor. I prepared the meat as recommended and had a delicious feast many nights in a row. The savory yet partially sweet taste of the child was like no other I had tried before, normally if the meat is harvested past 20 years, it is more gamy. 

For the person who is reading: I assume you have not tried the flesh of a human (or at least not intentionally). Who in your family do you think would taste the best? Please leave your full name in your comment so I know you are not a threat, and perhaps we could discuss more in person if you find this intriguing. 

Ingredients:
Salt 
Pepper
Ingredients: 
Child Ribs
Salt 
Pepper
Steak Rub

Recipe:
1. Age meat for 4 days
2. Bring water to a boil and place ribs in water
3. Boil for 10 minutes
4. Rub salt, pepper, and steak rub onto ribs to marinate
5. Allow to marinate for 30 minutes
6. Pressure cook on high for the last 15 minutes

What the *Fudge* !!

Chocolate Fudge


This dish I wanted to make for a post because it is at every holiday party I attend courtesy of my lovely grandmother. So I thought why not try it ! So I gathered the following list of ingredients: 

Ingredients:

- 11/2 cups granulated sugar
- 2/3 cup evaporated milk
- 2 tablespoons butter or margarine
- 1/4 teaspoon salt
- 2 cups miniature marshmallows
- 11/2 cups (9 oz.) semi-sweet chocolate morsels 
- 1 teaspoon vanilla extract.

To start, I had to line a 8 inch baking ban with foil. Then, after doing that I combined sugar, butter, salt, and evaporated milk into a saucepan. Then, my book said, " Bring to a full boil whilst stirring constantly for 4 to 5 minutes, remove from heat" (Meredith). I then followed the instructions , to paraphrase my book told me to add in the marshmallows, morsels, and vanilla extract then stir until the marshmallows are melted in. Here are some pictures of that:
chocolate, melted marshmallow, etc. mixture.
First mixture of milk, sugar, butter, etc.


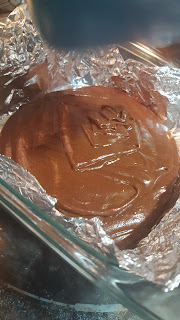
After that, I poured the mixture into the baking pan and cooled over a period of a few hours. This wasn't a tough dessert to make because it was quick and there was nothing to really time. So after it cooled the end product looked like this:

poured into pan (not cooled)
Cut after cooled

Ready to serve!!

 This although not quite being a challenge was fun to make and I'm glad I did because I enjoyed it a lot. Also, I was very pleases with the turn out because it looks great!

Question: Have you made any desserts that are made by your family? If so what and how was the experience recreating the dish?

Citation: Corperation, Meredith. New Cookbook. Des Moines, IA: Better Homes and Gardens, 2002. Print.

Practice makes perfect

As we finish up with the quarter 2 blogs, I would liked to say it has been a fun and a new adventure that I am glad to have experienced with my fellow classmate. When participating in any activity, it is always important to practice either daily or weekly. When playing basketball you will come face to face with players that have out of this world skills and if you ask them they will always give you the same answer. Practice makes perfect.


In the Zone Offenses book it says, " The results pf your practice planning are not always determined by your knowledge of X's and O's. At least equally important is your ability to work with people. You must be able to motivate them in a positive direction and design the mechanical aspects of your practice sessions to create a viable teaching - learning environment." (Krause and Harkins).


Under the leg


Simple under the leg dribbling can improve quick fast explosion towards the hoop being as smooth as possible.


Right or left hand dribble

When you are at the house and you have nothing to do or it is raining day, you can practice simple left or right hand by consistently dribbling creating familiar foundation.


Jump-shot Form


Practicing shooting everyday will ultimately improve you field goal percentage.


From start to finish I have learned many new techniques and basketball experienced that I can teach others or improve for my self. I learned what the guards are shown in the play books as well as new plays. As we finish up with the blog post I leave this with you.

What was your favorite blog post?

Harkins, Harry L., and Jerry Krause. Zone Offenses for Men's and Women's Basketball. Champaign, IL: Coaches Choice, 1997. Print.


Making Sacrifices

Making Sacrifices

Hey guys!

For my last post I wanted to go over important things I learned from reading Yasser Seirawan's book and share the final thing I learned. When I did my first blog a couple months ago I knew nothing about chess except the basic rules. I did not know of the countless strategies players could use to there advantage and how hard the game really was. Now I am feel confident enough to call myself a good chess player and its all thanks to Yasser Seirawan and his amazing book. The most important think I think I learned from reading his book is that anyone can become a great chess player if they try hard enough.
The final thing I learned from reading Yasser Seirawan's book is that you must sacrifice key pieces if you want to win. One strategy I learned was the Queen sacrifice tactic which is when you sacrifice your queen in return for tactical or positional compensation. A lot of times a queen sacrifice at the right time can lead to a quick checkmate. In the picture below you can see that by letting the opponent take my queen it distracted him and I am able to get near his king.

 
This is a very risky Strategy to use against very good players since they will be able to see that you want them to attack the queen however when playing against a casual player sacrificing the queen is a very good strategy because they will want to attack the queen the first chance they get.

How do you think Sacrificing a players own pieces can benefit them?


Line

For my fourth post, I will be discussing the use of lines in drawing. It is a basic concept, but line is an important part of drawing. It can be used in many different ways to create width and length. For this blog, I will explain the importance of line and the different ways in which it can be used. 


A line has no width. It is a measure of length. Therefore, what we call a "line" in art can more correctly be called a "mark of a line," and it represents the measure of length. The mark can either represent an object or the separation of objects. The separating line divides a space into multiple spaces. This introduces geometric relationships to the scene, "with individual identities to the different spaces" (Harding 53).  This means that the line creates a different feeling based on how you create it. A hard or soft line suggests the quality of the relationship. This separating mark should be treated as a space itself, with breadth, depth, darkness and other qualities that relate the objects in the drawing.

A contour line is an example of a specific type of line. Contour lines suggest that the fields contain different objects. They can be considered silhouettes or outlines. Contour lines can "suggest form based only on important points of separation" (Harding 55). This means that the shape of an object is expressed through lines and no specific information is given about the object. For example, if you take away all the shading from my drawing, what you would have left are the contour lines, or the general layout of the composition.

The last type of line I am going to discuss in this blog is a shadow line. The human eye uses shadows to recognize the separation of objects. We often suggest shadows in our drawings with marks, hatching which lets the viewer recognize the objects. Close and repeated use of shadows can "suggest texture of the object that the shadow lies upon" (Harding 56). Each object in the scene is separated from the others by marks that represent shadows. For example, in the drawing above, the shadows on his collar separates it from the neck and creates a separation.

As you can see, line can be used in many distinct ways and creates a new look depending on how you use it. It is a fundamental element when it comes to drawing and is important to understand when to use a certain type of line.

Question: Are there any other ways in which line is incorporated within a drawing?

Harding, James Duffield. Harding's Lessons on Drawing: A Classic Approach. Mineola, NY: Dover Publications, 2007. Print.

The Curveball


This is one of the most useful and used off-speed pitches in the game. The curveball excellent for putting batter off-balance and it keeps them guessing which pitch is going to be thrown next. In this post I will be discussing why the curveball is useful, when to use it, and of course how to throw. The curveball, as a pitcher is my favorite ball to throw, as a batter it is not as fun.

How to Hold

Similarly, to knuckle balls, there are a few different ways to throw curveballs. First, place your index and middle finger on the seams like so:

http://baseballphysics.wikispaces.com/file/view/Slider.JPG/123125633/Slider.JPG

Then, place your thumb on top of the seams that are along the same seam, but is further down on the ball. This helps with stability when releasing. And then, just like many other pitches, curl your pinkie and ring fingre on the seams opposite of the index and middle. Make sure that these fingers are resting on top of the seam and not too much pressure is being used when placing them (Clark 50).

http://2.bp.blogspot.com/-Lhhj2EgimNQ/TcRRkot8YxI/AAAAAAAAAFg/rRexgqsGW7c/s1600/IMG_1110.JPG


The Release

When releasing, do everything you would normally do to throw a fastball (Clark 51), except when releasing snap your arm (not too much or you can injure your arm) but just enough so that the ball rolls off your index finger and has top spin. This allows aerodynamics to take over and the seams on the ball act like wings and force the ball to drop at a steeper angle than a traditional fastball. When practicing, especially if you are a younger pitcher, don’t over use your arm especially with curveballs because when throwing can put stress on your UCL (tendon that is in your elbow) and damaging it can lead to the extreme case of Tommy John surgery.

Extra Tips:

With curveballs, I don’t suggest throwing them unless your arm is in good shape for pitching. Also just like with all the other pitches, practicing right before a game isn’t the best idea. I suggest practicing your throwing well before your first game, at least a couple of months to help build muscle memory and strengthen your arm beforehand.


Source:

Clark, Dave. Chicago: Ivan R. Dee, 2006. Print.