Thursday, December 28, 2017

Hiking: The importance of layering on winter hikes


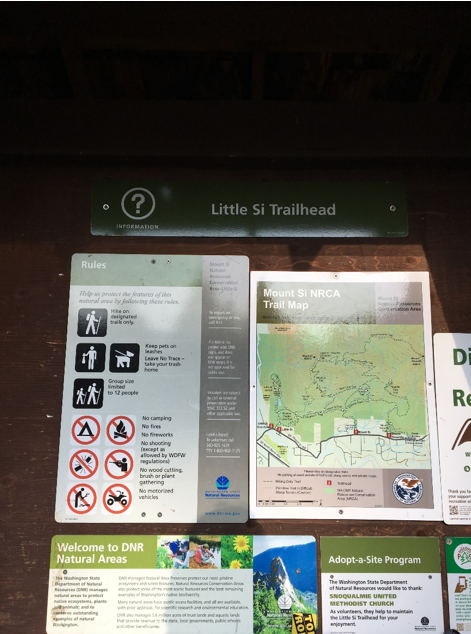
While hiking in winter comes with stunning views and clear air, it’s also comes with low temperatures and freezing wind. Layering your clothes keeps you warm and allows you to control your temperature if you start to sweat. Little Si is 4.7 miles with 1,575 feet of elevation, and in December, very cold. 
In The Idiot’s Complete Guide to Hiking and Backpacking, it explains the best way to layer your clothing to keep warm on a winter hike. “Two of the most versatile options for hikers are a long sleeve polypro shirt with a half zip down the chest, and a pair of quick drying, nylon pants. By adjusting the sleeves and zipper, the shirt can help you warm up or cool down. Nylon pants offer durability, water- resistance, and comfort in all kinds of terrain and conditions” (Stevenson 145). The author explains what the order of clothing should be, why they’re helpful, and what they do. A base layer should be a t- shirt, especially one of a thermal or polyester material which wicks away moisture and dries quicker than cotton if wet. Insulating layers are best if they’re wool or fleece, keeping you warmer by trapping your body’s heat. Lastly, an outer layer that is waterproof and blocks wind (Stevenson 144). I followed this for this hike, and it worked out well. 


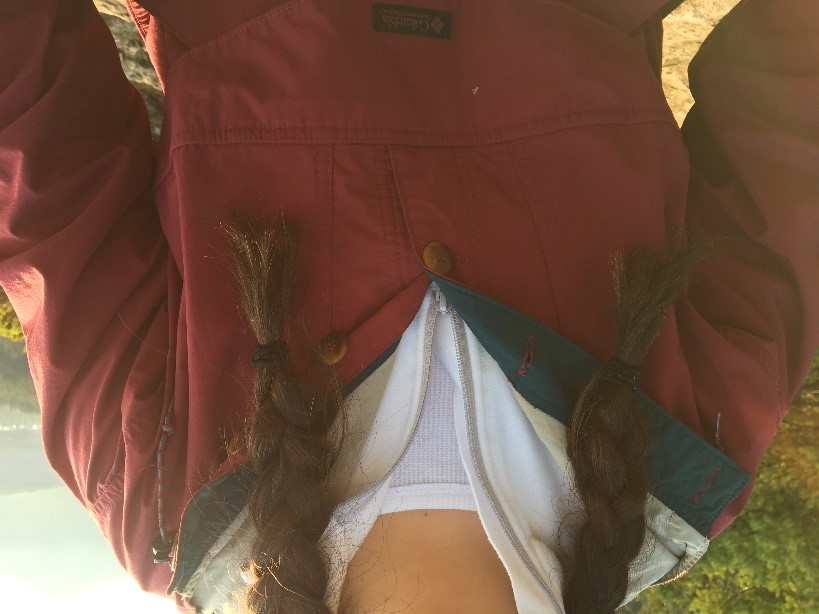
I wore a Columbia windbreaker which blocked the wind, but also was heavy enough to add a little extra warmth. Underneath, I wore a Helly Hansen half zip pullover with a thermal long sleeve beneath that. Finally, leggings (nylon/ spandex material) made it easy to move around and helped keep my body at a comfortable temperature. I was warm, and able to remove layers if necessary. It was the easiest and I found, the most comfortable option.
 Have you ever been hiking in the winter? If so, what was most helpful for you?

Thanks for reading! 


Stevenson, Jason. The Complete Idiot's Guide to Backpacking and Hiking. Alpha Books, 2010. 

Hello cupcakes!

It is a couple days after Christmas, and no matter how much food I ate over the holidays, I am still always hungry for cupcakes. When my family got together on Christmas Eve, there were lots of sweets like cakes, and pastries, and candies, but I was still longing the taste of cupcakes because they are my favorite comfort dessert. To fulfill my craving for cupcakes I baked some delicious, chocolate ones.

In my last blog, I did a simple frosting coating on the cupcakes with a spatula. This time, I decided to actually pipe the frosting on. Now, here's a life hack; since we all have Ziploc bags at home instead of piping bags with frosting tips, we can use them to pipe the frosting on. Luckily, the book Hello Cupcake! by Karen Tack & Alan Richardson gave me tips for this life hack method. On page 13, they tell us how to properly fill a Ziploc bag in order to be able to frost cupcakes, "To fill the ziplock, hold the bottom of the bag inside out over your hand. Using a spatula, fill the area of the bag inside your hand. Lift the edges of the bag up and around the frosting, press out the excess air, and seal the bag. Grasp the bag by the zippered edge and squeeze the frosting down to one corner." I used these helpful hints and then I cut a hole in the corner with scissors to create a frosting tip.
And then, I used this Ziploc piping bag to pipe the frosting on my cupcakes. This life hack was so helpful because I don't have piping bags with different frosting tips, but I love baking cupcakes and I want to make them look good, so using a Ziploc bag instead is very useful. 
I did a basic design on my cupcakes, but we're just getting started! Just wait until my next blog post, I'll be using frosting to make decorations and designs on cupcakes, stay tuned! 

What was the most useful life hack you've used? And do you think you will try this one out? 


Richardson, Alan, and Karen Tack. Hello, Cupcake! Houghton Mifflin, 2009.


Volleyball Skills and Drills: Receiving Serves

“If a team cannot receive the opposing team’s serve and transition into an effective attack, the coach and team members might as well pack it up and go home” (AVCA 20).

The serve receiver and the passer are the same thing and volleyball coaches consider the two terms synonymous.

An effective server must have good visual skills, from tracking the ball the exact moment it leaves the opposing servers hand to being able to judge what direction the ball will go in. They must also have the ability of concentration, focusing only on the ball will help the serve receiver reach the ball in time and accurately. Lastly, they must have the physical ability to get the job done. The player needs to be able to move efficiently to the ball and move to the point where they can intercept the ball before it gets there.


The passing process starts off with your feet spread wider than your shoulder width, still having the ability to push off from side to side, with one foot slightly ahead of the other one. The knees should be bent so that they are forward past the toes. The body weight should be on the balls of your feet, your shoulder and back should form a 45-degree angle, and the arms should be extended in front of the body (parallel to the upper leg).


(ignore my nails)
Your starting stance should be a medium position. You should also be reading the serve while taking one step towards the ball. When hitting the ball both hands should be locked together while the heels of the hands are together. For me, I prefer linking my fingers together while having the heels of my hands together. The arms and hands should be in the vision range of the receiver. Even though the legs and body moves the platform stays the same.


COMMENT DOWN BELOW!
Lenberg, Kinda. Volleyball Skills & Drills. Human Kinetics, 2006.

Folded Stars

Christmas is unfortunately over and the holidays are rolling to an end, but handmade crafts don't go out of season! For this blog post, I attempted to make something that isn't specifically for Christmas or any other holiday. In the book, Artful Christmas: 30 Elegant Craft Projects by Susan Wasinger, I found a cute and interesting origami craft that didn't look too difficult or time-consuming to make.

The materials were fairly easy to access because the only thing this project required was several sheets of patterned paper. To make one folded star, I needed six sheets of paper and I had to cut the sheets into four-inch squares. However, for the first star I made, I kept each square six inches by six inches in order to make a larger star. 


Then, I was instructed to fold the paper in half diagonally by first folding the bottom left corner up to the top right corner and creasing it. After unfolding the sheet, I was to fold the bottom right corner up to meet the top left corner and crease it and unfold it once again (Wasinger 124). The next step was to flip the paper over so the patterned side faced up. "Fold the paper in half along its center... Crease the paper and unfold it. Then fold the paper in half along its other axis. Crease it and unfold it" (Wasinger 125).

With the easier steps complete, I continued to fold. The book directed me to nudge the folds on either side inward so my paper looked like a double-triangle configuration. Finally, I proceeded to, "Fold the right-hand point of the triangle up to the top of the triangle. Fold the left-hand point of the triangle up as well. Turn the paper over, and fold the points of the triangle up on the other side" (Wasinger 125). Once I finished this step for the first sheet of paper, I had to repeat all of the steps for the remaining five sheets. 


The most difficult part of making this craft was combining the six sheets together. To do this, I had to insert the points of one end of the triangular piece into the folds of another piece. I worked my way around the star, and continued adding each piece. At the end, the points of the last triangular piece should have been inserted into those of the first piece. My final product looked okay, but it took me a while to fully insert each piece.


I also made another folded star, but this time I completely followed Wasinger's instructions and cut each of the sheets into four-inch squares. I followed the directions once more and folded each paper into a triangular piece.


In my opinion, the second folded star turned out better because the size was smaller and looked the way the author intended it to.


This origami craft is reasonably easy to make and can be used as an ornament or just simply as a decoration. I enjoyed making it and I plan to create these folded stars again in the future!


Do you like origami and what origami crafts have you made before?


Wasinger, Susan. Artful Christmas: 30 Elegant Craft Projects. Lark, 2014


Torta Maddalena (Sponge Cake)


     While on winter break I wanted to continue to improve my baking skills, so last week I took a crack at Torta Maddalena also known as sponge cake. I found this recipe in The Il Fornaio Baking Book by Franco Galli. This classic recipe is used to construct the famous Italian Tiramisu, but before I try that trickier desert I wanted to practice the cake. Galli explains that he doesn’t know where the Italian name of this desert came from, “But Italians often name dishes after saints, so perhaps it honors Santa Maria Maddalena,” (Galli 159). No matter where the name came from the dish is a great classic that can be used in a multitude of sweet treats.
Mixing the egg mixture into a mousse. 
     For a perfectly formed sponge cake Galli recommends a springform pan which has sides that can be easily removed from the bottom. This pan allows for cakes with soft and fragile bottoms to be easily removed from the pan. They are commonly used to bake cheesecakes, quiche, and coffee cakes. I greased my pan and placed a sheet of parchment paper  on the bottom. The paper helps stop the cake from sticking to the base of the pan. I then preheated the oven to 350* F. Next, I sifted flour and baking powder together into a bowl before mixing the wet ingredients.
     To mix the wet ingredients I made a double boiler. I filled a pot filled with water and set a bowl on top of it.  As the water in the bottom pot reached a boil, the top bowl heated up warming the ingredients.  I added the honey, lemon zest, eggs, sugar and the egg yolks to the warmed ingredients in the top bowl.  To separate the yolks, I squeezed a plastic water bottle over the yolk so the yellow center of the egg was sucked into the bottle. It was tricky to get the yolk in to the bottle without it popping but eventually I got three yolks separated and added to the double boiler.
The cake baking. 
     Once the double boiler had heated the mixture to about 120* F. I poured the yellow liquid into a bowl and began to whisk it at high speeds. After about 10 minutes of whisking the mixture had formed a fluffy, creamy, and smooth mousse. Slowly I sifted the flour mixture into the wet mousse. Galli explains the best way to combine the wet and dry mixes, “Using a wire whisk combine the dry ingredients and the wet ingredients with a folding motion: gently move from top to bottom of the batter in a continuous action until no lumps remain” (Galli 159). Once I had carefully followed Galli’s instructions, I poured the batter into the cake pan and placed in the cake in the oven. I baked the cake for about 40 minutes before pulling it from the blistering oven. The cake had 5 minutes to cool before I carefully unclasped and lifted off the sides of the pan.  Then, 10 minutes later I lifted the base of the pan off the cake bottom and then pulled the paper from the bottom. Thanks to my prep, the cake easily came free of the pan with having to be cut. After freeing the cake from the pan, it was ready to enjoy.
Finished slice of sponge cake. 
The cake after it was cut. 
     For my first time baking a sponge cake and my first time using a double boiler the cake came out pretty good. Next time I try this recipe, I want to combine the wet ingredients in a bowl and then pour the mixture into the boiler so everything starts cooking at the same time. I would also whip up a creamy frosting to cover the cake and add more flavor. I learned a lot from this recipe and I’m excited to use my new skills on other recipes. Have you ever used a double boiler? Did it work for you or do you need to keep practicing? Let me know in the comments below.

Doughnuts - A Basic Raised Doughnut

In my cookbook, the first recipe on there was the basic raised doughnut. It's the type of doughnut that most people see at stores. Before this, I had never made doughnuts before. At first, just looking over the recipe I felt overwhelmed. I had never made doughnuts before and I saw long paragraphs on the recipe. I had to ask my mom for help on some things, but the doughnuts turned out well.

The recipe asked for 9 ingredients and said it would make about 8-14 doughnuts. It also said that it takes 20 minutes of active time, which probably is the time it takes for someone to be actively cooking. The recipe says that the doughnuts take 2 hours to be done.

While reading over the recipe and making the doughnuts, I really liked how detailed the recipe was. The paragraphs for the steps on how to make the doughnuts had enough details that explained everything well.


I enjoyed making the doughnuts. They came out better than I expected they would. A part I struggled with was making the actual dough. I also did find that the sugar glaze didn't really stick to the doughnut. The chocolate glaze stuck to the doughnut better. Still, they tasted pretty good.

Doughnuts with the glazes I made. 

Do you guys like doughnuts?

Doughnuts - A Chocolate Glaze

Along with my basic sugar glaze, I also decided to make a chocolate glaze. It is a very common glaze that is on many doughnuts. When I read the recipe, I noticed that it was very short and simple like the glaze recipe. It contained only 4 ingredients and it had 1 step like the basic glaze recipe.

Ingredients:
11/2 cups of confectioner's sugar
4 tablespoons of cocoa powder
2 tablespoons of milk or water (I used milk)
2 teaspoons of vanilla

I used this type of cocoa powder but it was very bitter.


Steps:
1. Stir together the sugar and cocoa powder in a medium bowl. Slowly stir in the milk and vanilla, a little at a time, to make a smooth, pourable glaze.


So at first, I saw the easy recipe and I thought it would be easy to make. The first batch of chocolate glaze that I made ended up tasting really bitter, almost like a coffee. It was also very thick and not pourable like the recipe said. I made a second batch and it became more smooth, but it still had the coffee taste. The bitter taste might have been because of the unsweetened cocoa powder. I decided to just keep it and put it on the doughnuts and it applied nicely and looked good. It tasted okay when it was on the doughnut.


Have you guys ever tried to make something and it didn't come out how you wanted it to?